
Course The Rose - getting started (#1)
Hello everyone!
In this course I take you step by step through The Rose, our invoicing tool. We start with the basics: what the program is, how you log in and what you see on screen. In the following parts you set up your organisation, clients and products, create your first invoice and send it. After that you learn to track payments and correct mistakes, and only at the end come the extras: quotations, subscriptions, layouts and more.
You do not have to follow the course in one go. If you have been using The Rose for a while, jump straight to the part you need.
Part 1: what is The Rose?
The Rose is the program in which your non-profit creates its sales invoices: membership fees, participation fees, rent, sponsorship, services for a municipality or another organisation. You also use it for quotations and credit notes, you send everything digitally (by email or via Peppol) and you track who has paid.
Behind The Rose sits the program SimplyBooks (in Dutch: Eenvoudig Factureren) from a Belgian supplier. We use our own edition, with our logo and our link to the accounts. If you see the name SimplyBooks or Eenvoudig Factureren in the supplier’s help centre or in a video, it is the same program as yours. Everything explained there works identically for you.
Two things we arrange for you, so you do not have to think about them:
- Your account. We create your account in The Rose and link it to your file with us. You can add an extra user yourself or ask us (see course part 16); if you want the interface in English or French, ask us (see course part 15).
- The link with the accounts. Every invoice you send flows automatically into our accounting software. You do not have to email, print or upload anything. How that works is explained in course part 11.
Part 2: logging in
You log in at the address we gave you, with your email address and password. Forgotten your password? Use the button on the login screen; you receive an email to choose a new one. If you cannot find that email, check your junk folder first.
If you often work on the move, there is also an app for your smartphone with which you log in quickly by scanning a QR code on the login screen of your computer. The link to the app is in the supplier’s help centre (see the sources at the bottom).
Tip: switch on two-factor authentication as soon as you know your way around the program. Invoicing data is sensitive data. How to do that is in course part 16.
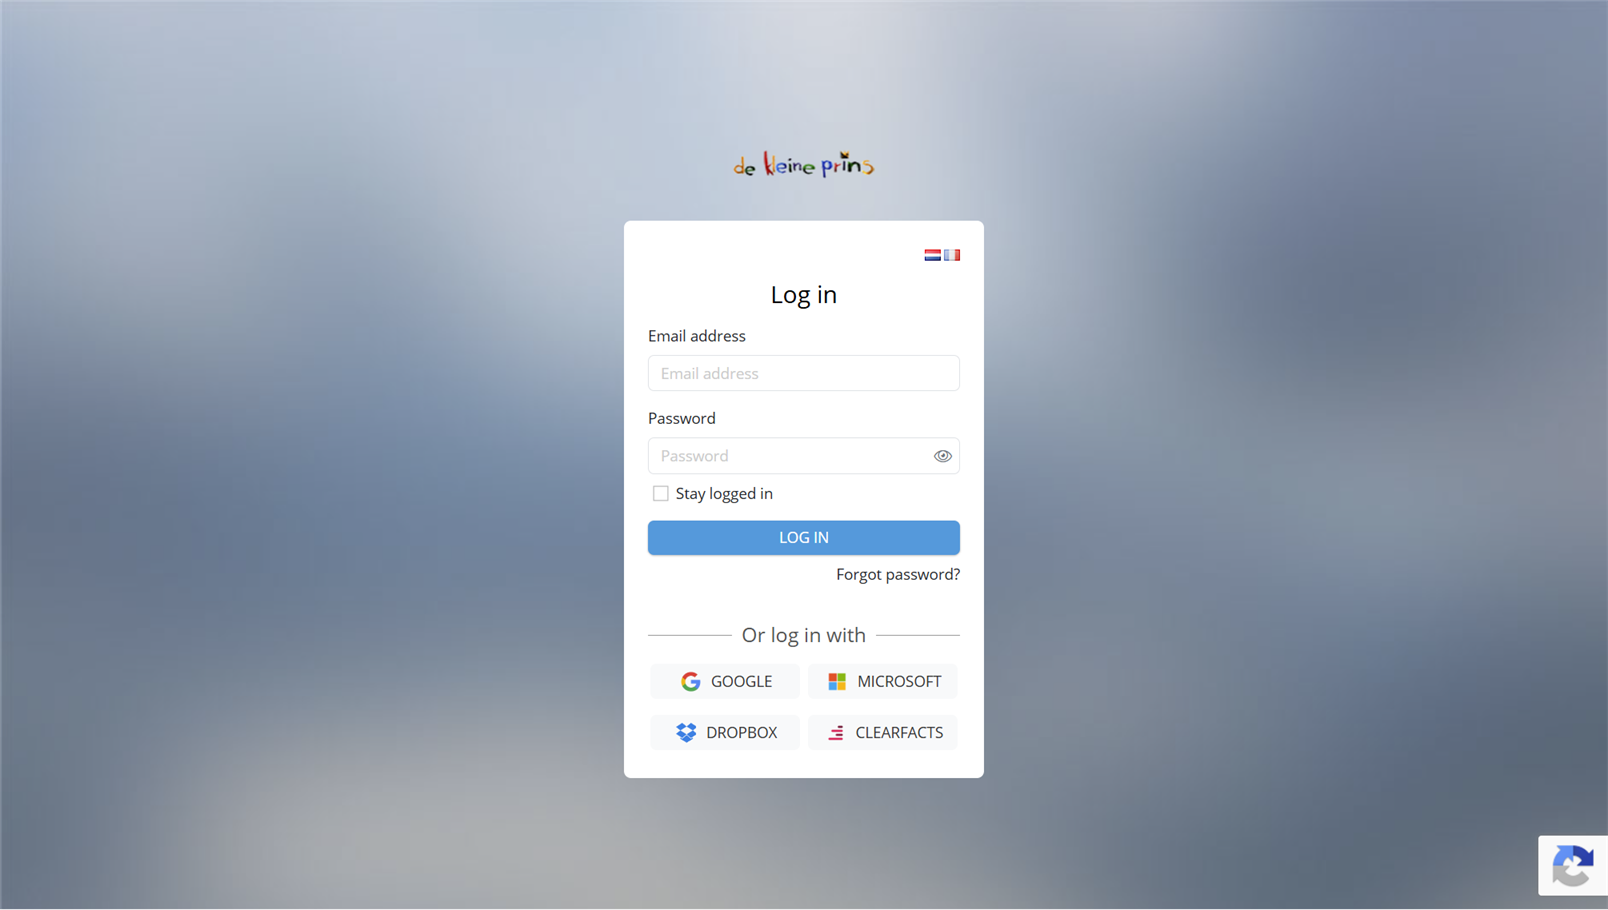
- The flags at the top right switch the language of the login page (Dutch, French); the language of the program itself is set on your account (course part 15).
- Email address, Password and Stay logged in; Forgot password? sends you the reset email.
- Or log in with: if your account is linked to a Google, Microsoft, Dropbox or Clearfacts login, you can use that instead of a password.
Part 3: a tour of the screen
After logging in you land on the overview of your invoices. The screen always has the same structure:
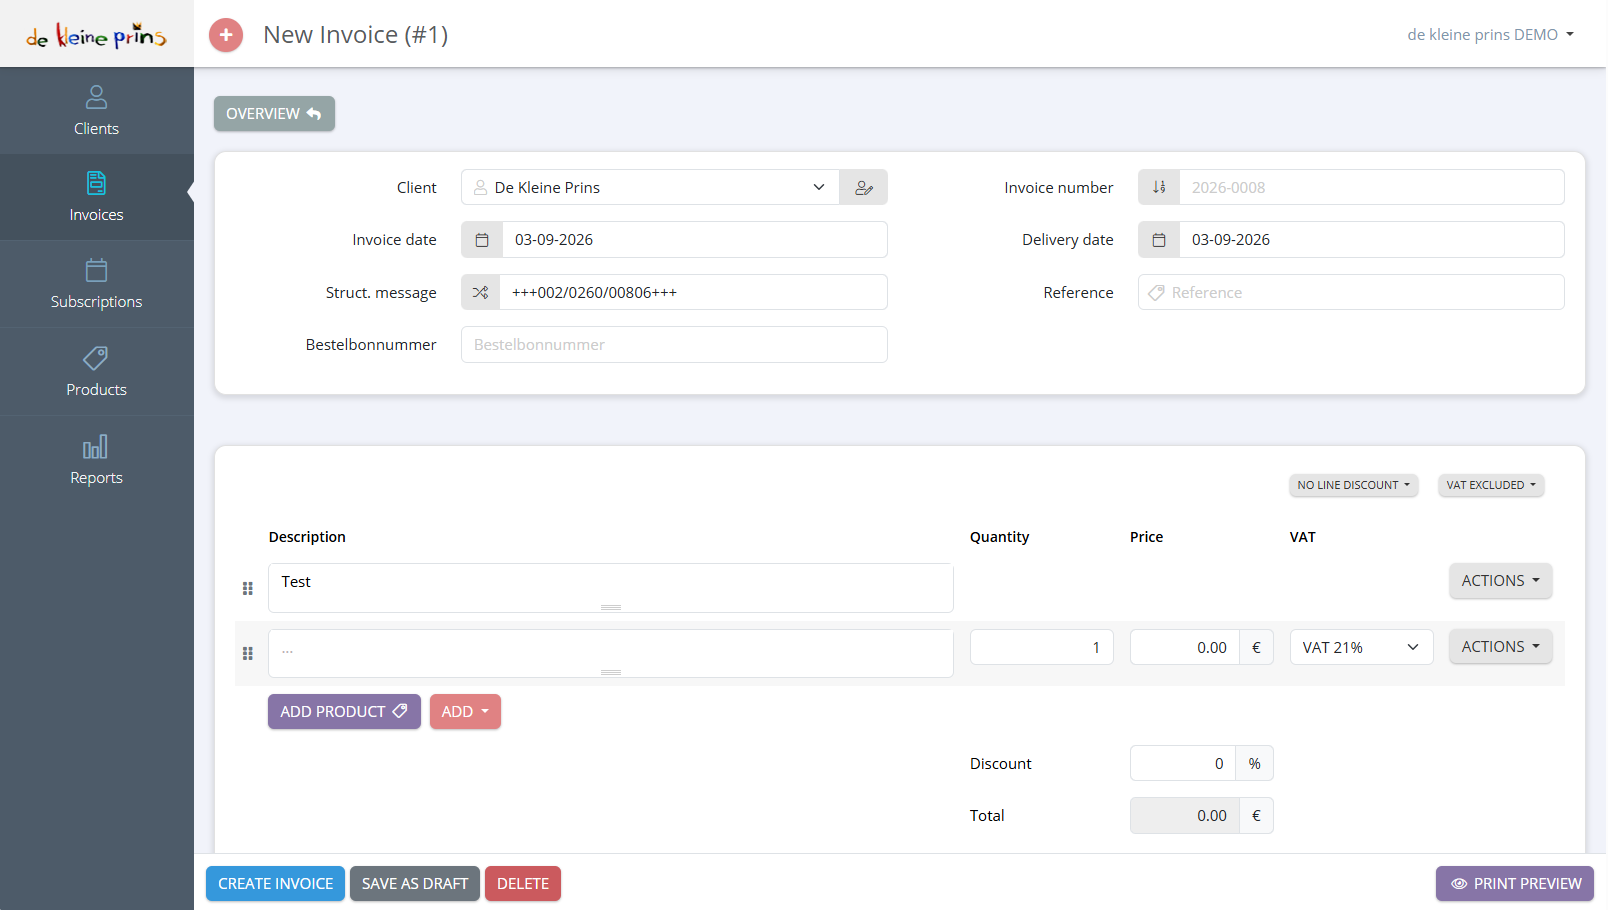
- The sidebar on the left is your main menu: Clients, Invoices, Subscriptions, Products and Reports. This is where you work most of the time.
- The title bar at the top shows where you are (here: a new invoice) and, on the right, the name of your organisation. Click that name for the account menu: Settings, Modules, Links, Layouts, Access Control (users), Notifications, Events, Help and Sign out. At the top of that menu you also find your personal User settings.
- The button bar under the title contains the actions for the screen you are on: back to the Overview, or on an invoice: Update, Print, Send, Reminder, Payment and Create document.
- The work area in the middle: the form or list you are working in.
What the menu items are for:
- Clients: everyone you invoice, with address, email address and VAT number (course part 3).
- Invoices: all your invoices and credit notes, with their status: draft, sent, paid, overdue (course part 5 and onwards).
- Subscriptions: invoices that recur automatically, such as monthly rent or annual membership fees (course part 13).
- Products: the things you charge for, with their price and VAT rate, so you do not have to type them every time (course part 4).
- Reports: overviews of your turnover, outstanding amounts and VAT (course part 11).
Quotations, purchase orders and other documents sit under Invoices or appear as a separate menu item once you activate the corresponding module under Modules. We come back to that in course part 12.
Part 4: how to use this course
The course consists of three blocks:
- The basics (course parts 1 to 7): everything you need to get one invoice out the door correctly. Follow these parts in order if you are new.
- Tracking and correcting (course parts 8 to 11): what happens after sending: payments, reminders, credit notes, reports and the flow into the accounts.
- Extras (course parts 12 to 16): functions not everyone needs. Read them when the question arises.
Each part ends with a short “Next step”. The screenshots come from our demo file; what you see may differ slightly depending on the modules that are active for you.
Part 5: need help?
- Questions about your invoices, your VAT status or the flow into the accounts: email your file manager or support@dkpa.be. Only we can answer those, because we know your file.
- Questions about a button or a screen: the supplier’s help centre is full of short articles with screenshots. At the bottom of each part of this course you find the articles that go with that part, under “More from the supplier”. Remember: there the program is called SimplyBooks.
Next step: in course part 2 you check whether your organisation’s details are correct, before you create your first invoice.
The screenshots on this page show the English interface of our demo file in The Rose.