
Course The Rose - creating and managing clients (#3)
Faster and more accurate invoicing starts with well-prepared data. A client you create correctly once, you then pick from a list every time: name, address, email address and VAT number are right on the invoice straight away and the invoice goes to the right address. In this part you learn to create, import and maintain clients.
Part 1: the client overview
Click Clients in the sidebar. You see your clients as cards, each with the address and, where applicable, the number of overdue invoices.
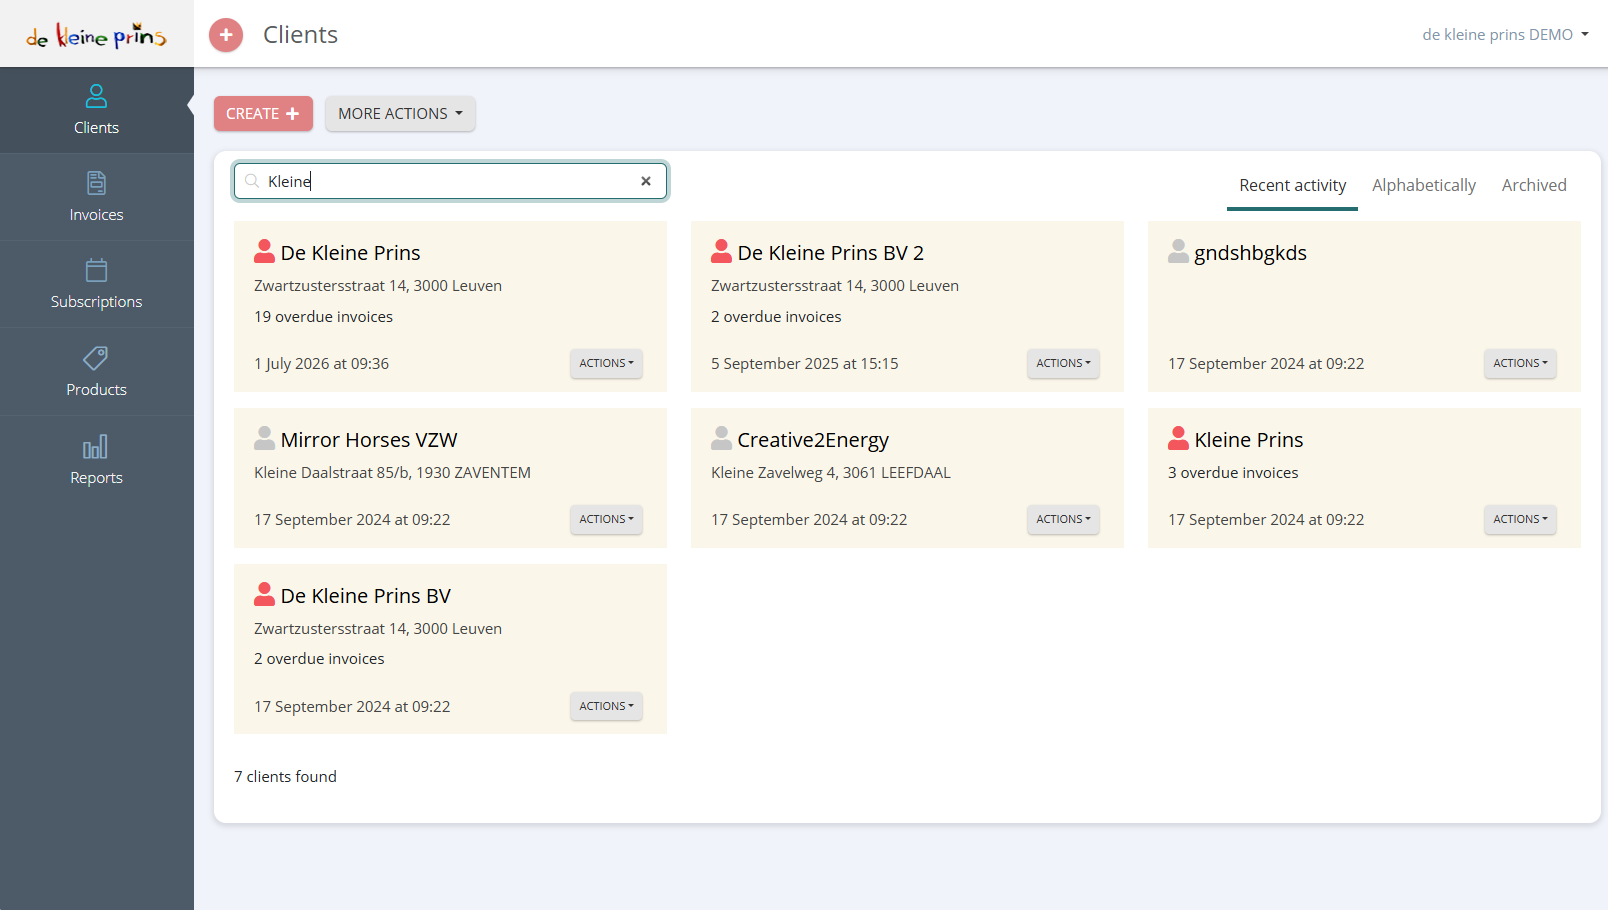
- Create: add a new client (see part 2).
- More actions: among other things the import from Excel (part 4) and the export of your client list.
- The search field: type part of the name to find a client quickly.
- The tabs Recent activity, Alphabetically and Archived: sort by what you used last or by name, or view clients you have archived.
- On each card the Actions button: Open, Update, Archive, Delete, and straight away create an invoice, quotation or other document for this client.
Tip: do not delete clients, archive them. An archived client disappears from your list, but its invoices remain and it stays searchable. Deleting is not possible anyway once invoices are attached to the client.
Part 2: creating a client
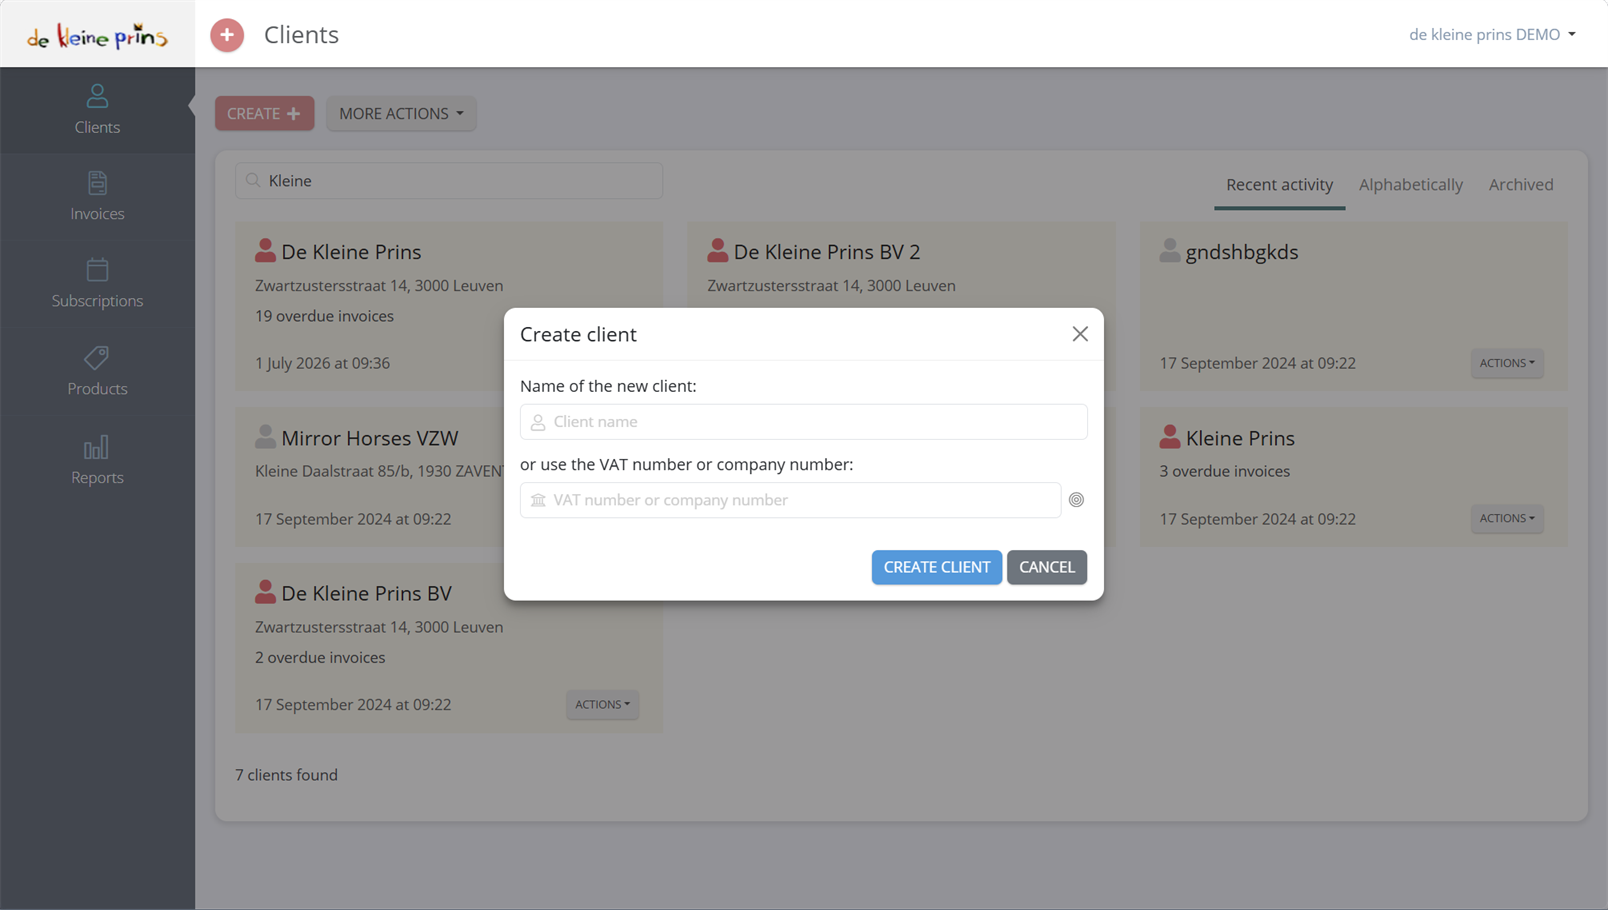
Click Create. A small window Create client opens with two possibilities: you type the Client name, or you type the VAT number or company number of the organisation. The second is the quickest route for a Belgian organisation: The Rose then fetches name and address itself from the Crossroads Bank for Enterprises. Click Create client; you land on the full client form (Change Client).
Under Client data you complete:
- Client name. For an organisation: the official name, as it appears in the Crossroads Bank. For a private individual: first name and surname.
- The choice VAT number, Company number or Private individual. This distinction determines whether a number is expected and, since 2026, how the invoice is sent: to a Belgian organisation subject to VAT it must go via Peppol, to a private individual by email (see course part 7). Fill in the number for every Belgian organisation, including another non-profit; with Retrieve company data The Rose completes the address. If you get the message that the number does not exist, check the digits and read the article about it at the bottom.
- Street and number, ZIP code + Place, Country. The billing address. If the client has a different shipping or building site address, add it separately with Add address.
- Email address. The address the invoices go to. With Add email address you enter several, e.g. the treasurer’s address and the general mailbox.
- Telephone number, Client number, Website are optional. Peppol ID you only fill in if the client uses a different identifier on the Peppol network than its VAT number, e.g. a GLN number (course part 7).
- Add data. For a salutation (Attn.), a contact person or a custom field of your own (course part 16). Optional, but polite: “Dear Ms Peeters” rather than “Dear Sports Club The Hares”.
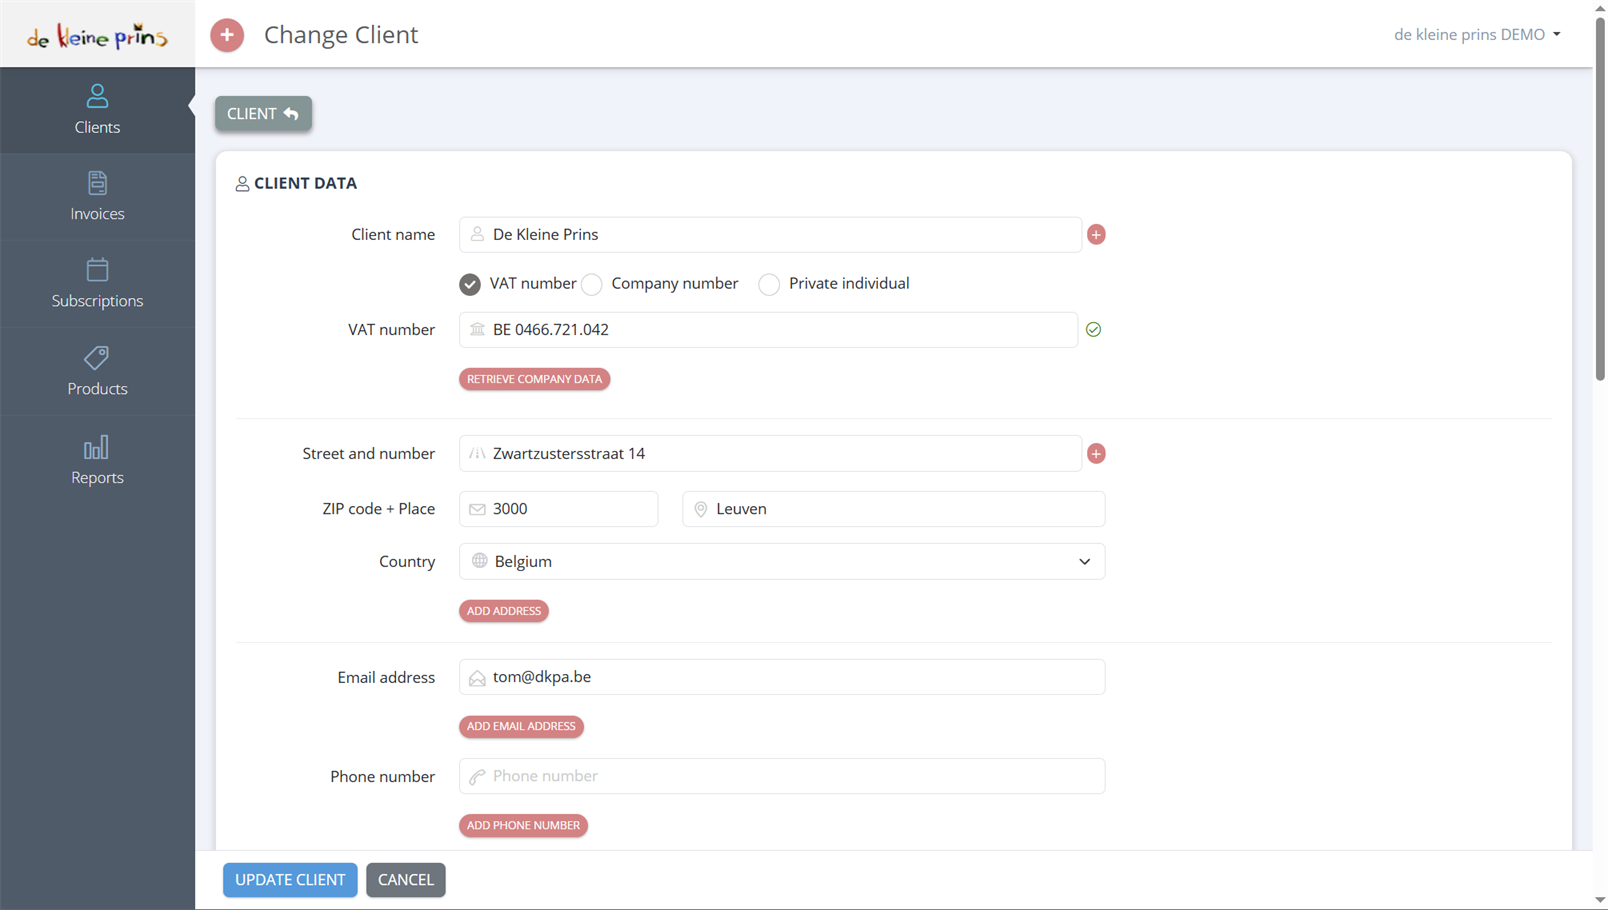
- Client name and the choice VAT number / Company number / Private individual; the green tick shows the VAT number was validated.
- Retrieve company data fills in the address from the Crossroads Bank.
- Address, Add address, email address(es) and phone number. The Settings heading follows further down (see part 3).
Click Update client. The client is now in your list and ready to be invoiced.
Part 3: client-specific settings
For each client you can deviate from your default settings from course part 2. Handy for the exceptions:
- a shorter or longer payment term (e.g. 60 days for a municipality, 8 days for a participation fee);
- a different language for the invoice and the accompanying email (Dutch, French, German), see course part 15;
- a different layout, e.g. with a project’s logo, see course part 14;
- a fixed discount or a different currency.
You find them at the bottom of the client form under the heading Settings: Invoice payment term, VAT rate, Default layout (per document type if you wish), Structured message (with a Generate button for a fixed message per client), Discount, Language and Document note (a fixed text above, below or instead of your default note). That heading only appears if the option Client Specific Settings is switched on under Modules; in our demo file it is. What you fill in here, The Rose applies to every new invoice for that client. So you only have to think about it once.
Part 4: importing a client list from Excel
If you already have a member list or client list in Excel, you do not have to retype it. Under More actions choose the import. You first download a sample file, put your data in the same columns (name, address, email, VAT number…) and upload the file. The Rose shows a preview before it creates the clients.
Three points of attention from practice:
- One row per client, with the official name. Avoid duplicates: if you import the same client twice, you get two cards and soon two invoices.
- VAT numbers in one consistent notation (e.g. BE0466721042 or BE 0466.721.042), and only for organisations.
- Email addresses checked: a typo here means an invoice that never arrives and only shows up at the reminder.
If you import your members for membership fees, also look at course part 13 straight away: with subscriptions you create those invoices automatically every year.
Part 5: maintaining clients
- Change of address or name: edit the client; existing invoices remain unchanged (which is correct: an invoice is a snapshot), new invoices get the new details.
- New email address: change it before you send the next invoice. An invoice that went to an old address you simply send again to the new one.
- Client stops: archive, do not delete (see part 1).
Next step: in course part 4 you create products for what you charge regularly.
The screenshots on this page show the English interface of our demo file in The Rose.