
Course The Rose - sending invoices by email (#6)
An invoice you print, put in an envelope and post costs time and money and arrives more slowly. Send it straight from The Rose: the client receives a neat email with the invoice as a PDF, and you see immediately in your overview what has been sent. This part is about email; for Belgian organisations with a VAT number you have been sending via Peppol since 2026, and you learn that in course part 7.
Part 1: the send window
Open the invoice and click Send in the button bar. A window opens with two tabs, Peppol and Email. Choose Email:
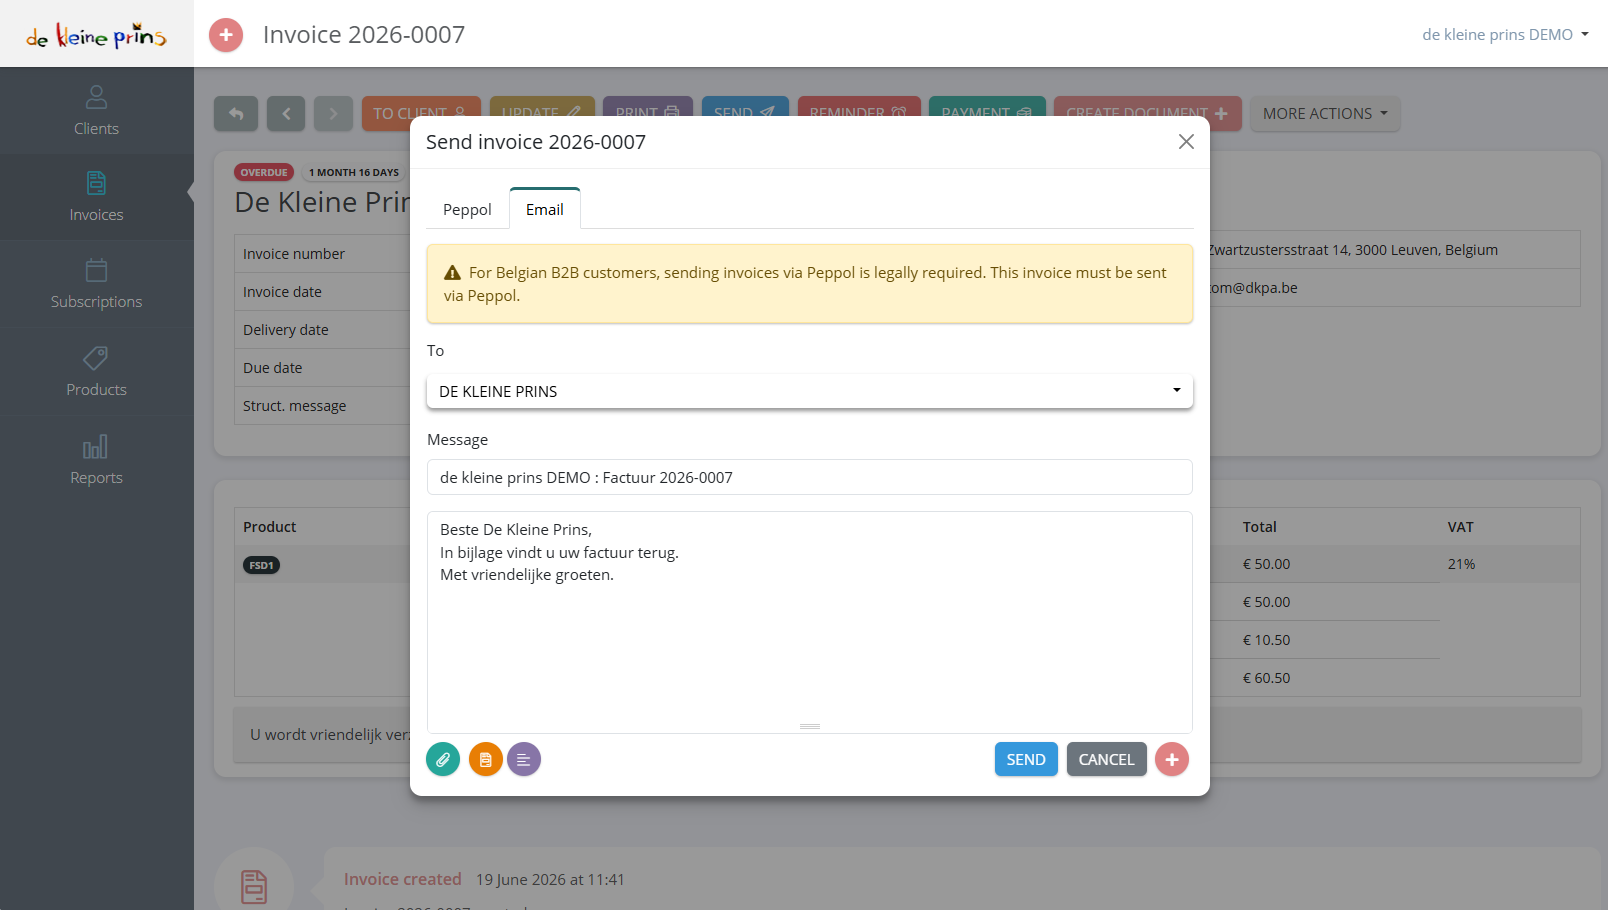
- The warning at the top only appears if the client is a Belgian organisation with a VAT number: then the invoice should go via Peppol (course part 7). For a private individual or a foreign client you do not see this message.
- To: the email address from the client details. You can choose or add another address here.
- Message: the subject and text of the email, pre-filled with your default text from the settings (course part 2). You can adjust the text for this one send without changing your default text.
- The icons at the bottom left: add an attachment (e.g. a participant list or a report), choose another email template, and the formatting of the text.
- Send and Cancel.
The invoice itself is attached to the email as a PDF automatically; you do not need to add it.
Part 2: the default text and variables
The text you see here comes from your email settings. Make it personal with variables: pieces of text between percent signs that The Rose replaces at each send with the real value, e.g. the client’s name, the invoice number, the total amount and the due date. That way each client gets an email that looks tailor-made, while you type nothing. The full list of variables is in the supplier’s article at the bottom.
A good default text for a non-profit is short and concrete: salutation, what the invoice is about, amount and due date, how to pay (with the structured message), and whom to contact with questions.
Part 3: sending and following up
Click Send. In the history at the bottom of the invoice “Invoice sent” appears with date and time, and in the invoice overview the invoice gets a delivery icon. That icon has two colours: one means the email has been sent, the other that it was actually delivered to the recipient. See the article on the blue and black delivery icon for the precise meaning. Sending also transmits the invoice to our accounts (course part 11); from now on you do not adjust it any more (course parts 5 and 10).
Did the email not arrive (wrong address, full mailbox)? Correct the address on the client and click Send again. The invoice itself does not change; only a second send is added to the history.
Part 4: several invoices at once
If you send a batch of invoices (e.g. all membership fees), you do not have to open them one by one. Select the invoices you want to send in the invoice overview and choose the send action for the selection. The Rose uses the default text and the email address of the respective client for each invoice.
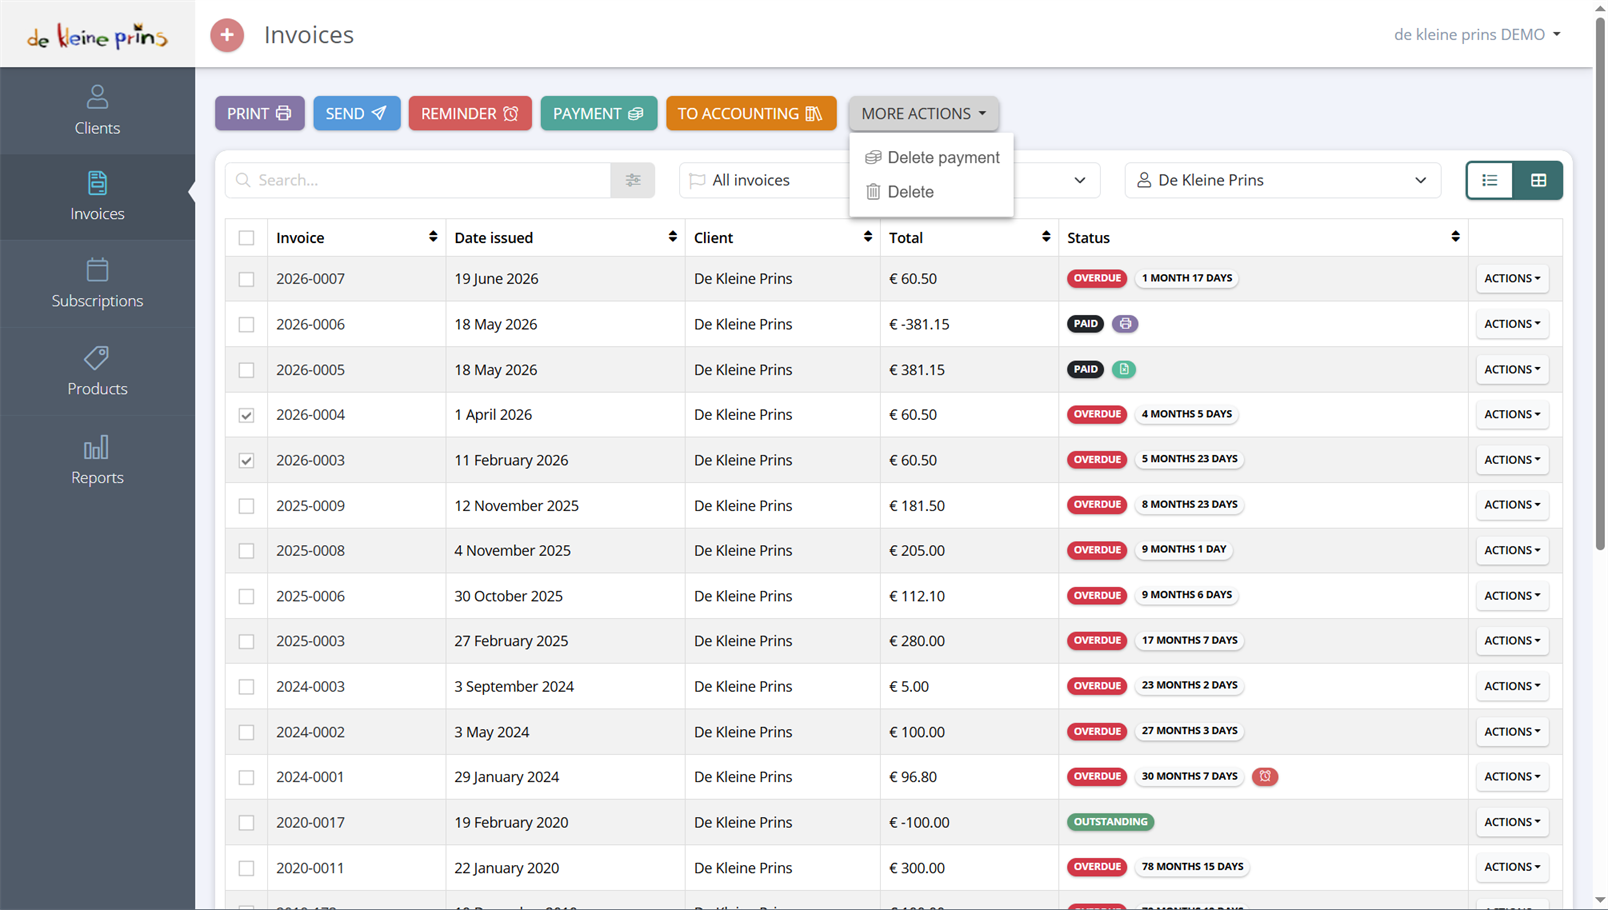
- Two invoices ticked in the left-hand column.
- As soon as you select, the button bar changes: Print, Send, Reminder, Payment, To accounting and More actions (Delete payment, Delete) now apply to the selection.
- The overview here is filtered on one client (De Kleine Prins); with Actions → Only this client on any row you get that filter in one click.
Part 5: printing or saving as PDF
If a client insists on a paper invoice, click Print in the button bar: you get the PDF, which you print or save. Only do this when you really have to: a paper invoice leaves no trace in the history and you cannot see whether it arrived.
Part 6: if your emails end up in spam
The emails leave from the supplier’s servers, with your address as sender. Some mail systems find that suspicious. If you notice that clients do not receive your invoices or find them in their junk folder, there is a solution: under Settings → Email → Send with choose Own email address (DNS) or your Own mailbox (Outlook, Gmail or SMTP). With the DNS option, a setting on your non-profit’s domain name gives the supplier’s servers permission to email on your behalf (SPF/DKIM). The article at the bottom explains what has to be done; whoever manages your website or email can set it up in a few minutes. Ask your file manager for help if you do not know whom to turn to.
Next step: in course part 7 you switch on Peppol, mandatory for invoices to Belgian organisations with a VAT number.
The screenshots on this page show the English interface of our demo file in The Rose.