
Course The Lantern - approval of invoices and payments (#14, optional)
Four eyes see more than two — certainly when money is leaving. The Lantern has two approval flows: one for invoices (approving before they are processed) and one for payments (approving before they reach the payment basket). You use them separately or together; in the latter case the invoice is approved first, and only then the payment. For a non-profit board this is THE way to build in internal control without paperwork: no more sign-off folders, but a trail of who approved what and when. There is also a webinar on approvals (in Dutch, with English subtitles).
Part 1: the two flows at a glance
- Invoice approval takes place in the purchase mailbox: an invoice can only be processed once it has been approved. This is the substantive check — is this invoice right, did we order this?
- Payment approval sits before the payment basket (course part 8): a payment must be approved before it can leave. This is the financial check — may this money go now, and authorised by whom?
A classic division of tasks in a non-profit: the coordinator approves the invoices (substance), the treasurer or chair the payments (money). Both flows are activated in the settings, Pay and approve tab — visible only to users with the Administrator profile (course part 15).
Part 2: setting up invoice approval
Tick Activate. The Lantern immediately adds a default rule — a “catch-all”: all invoices not covered by another rule must be approved by one or more people. You edit that rule with the pencil icon under Actions (who approves, how many people).
On top of that you create specific rules that deviate from the default rule based on supplier, label or amount. An example: all invoices from the payroll office above 5,000 euros must be approved by an extra person — the rest follows the default rule. That way you put the control where the risk sits, without pushing every small invoice through three pairs of hands.
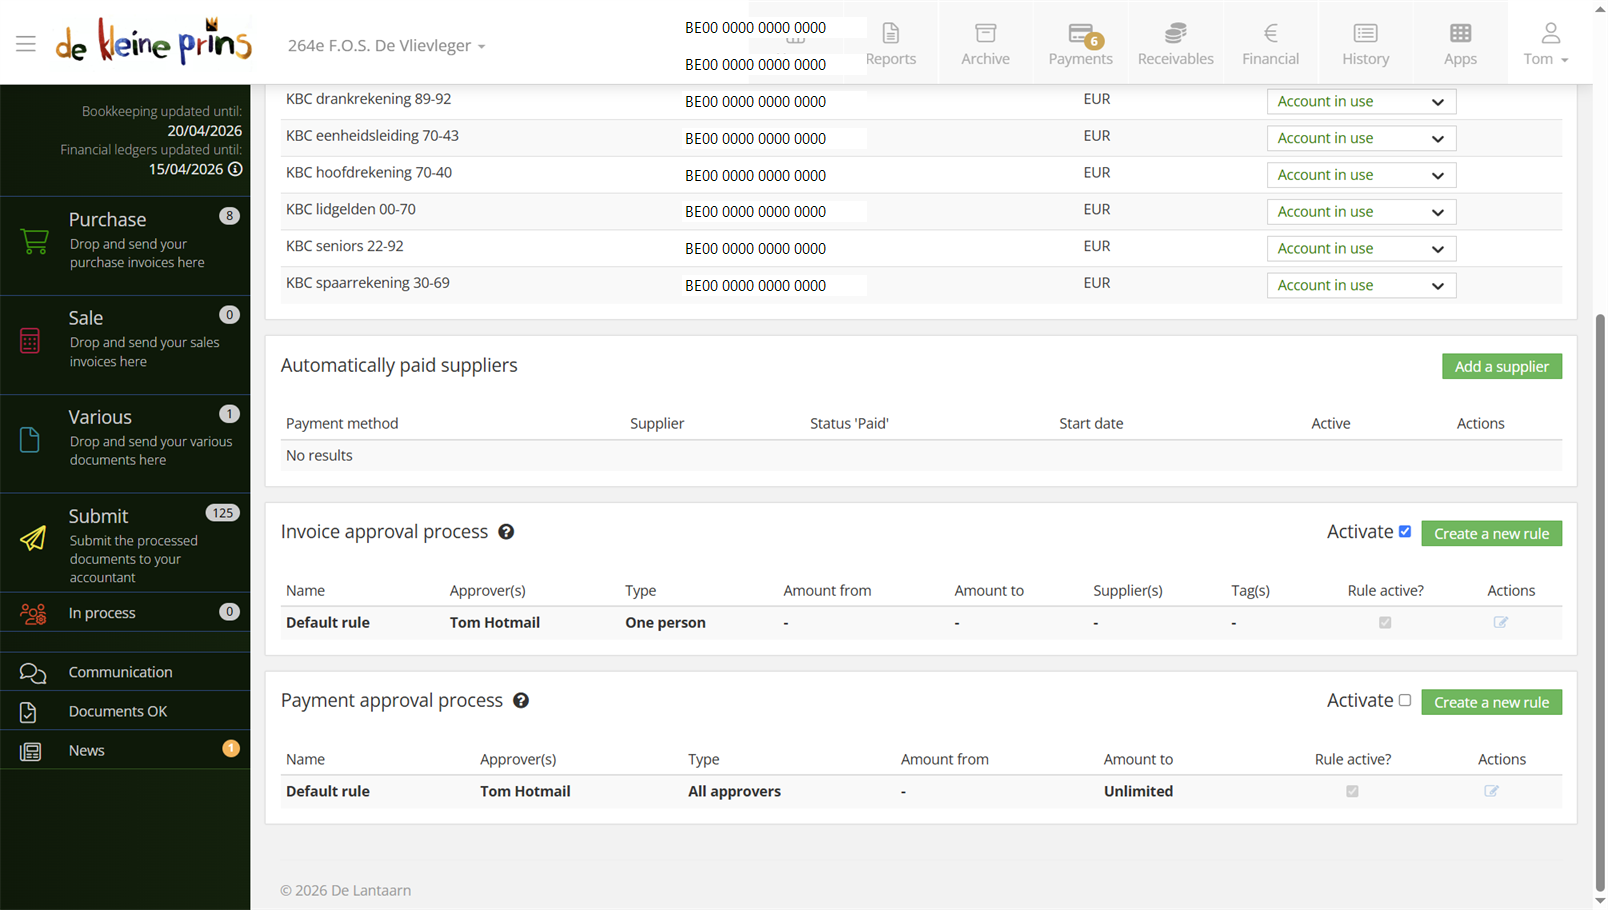
- The activated invoice approval with the default rule.
- Below it the payment approval process with its rule for unlimited approvals - and each time the Create new rule button for specific rules.
Important to know: a user with the Administrator profile can approve ANY invoice, regardless of the rules. Handy as an emergency brake, but bear it in mind when handing out that profile.
Part 3: approving in the purchase mailbox
After activation, three things change in the purchase mailbox:
- The overview gains an extra Approval column with each invoice’s approval status.
- Open an invoice via the eye icon and the buttons to approve or reject sit at the bottom right, with the rule that applies to it. When approving or rejecting you can add a comment.
- After handling, The Lantern shows who approved; hover over the speech bubble to read the approver’s comment. So afterwards it can always be reconstructed who decided what — exactly what you want to be able to show at an audit or cash review.
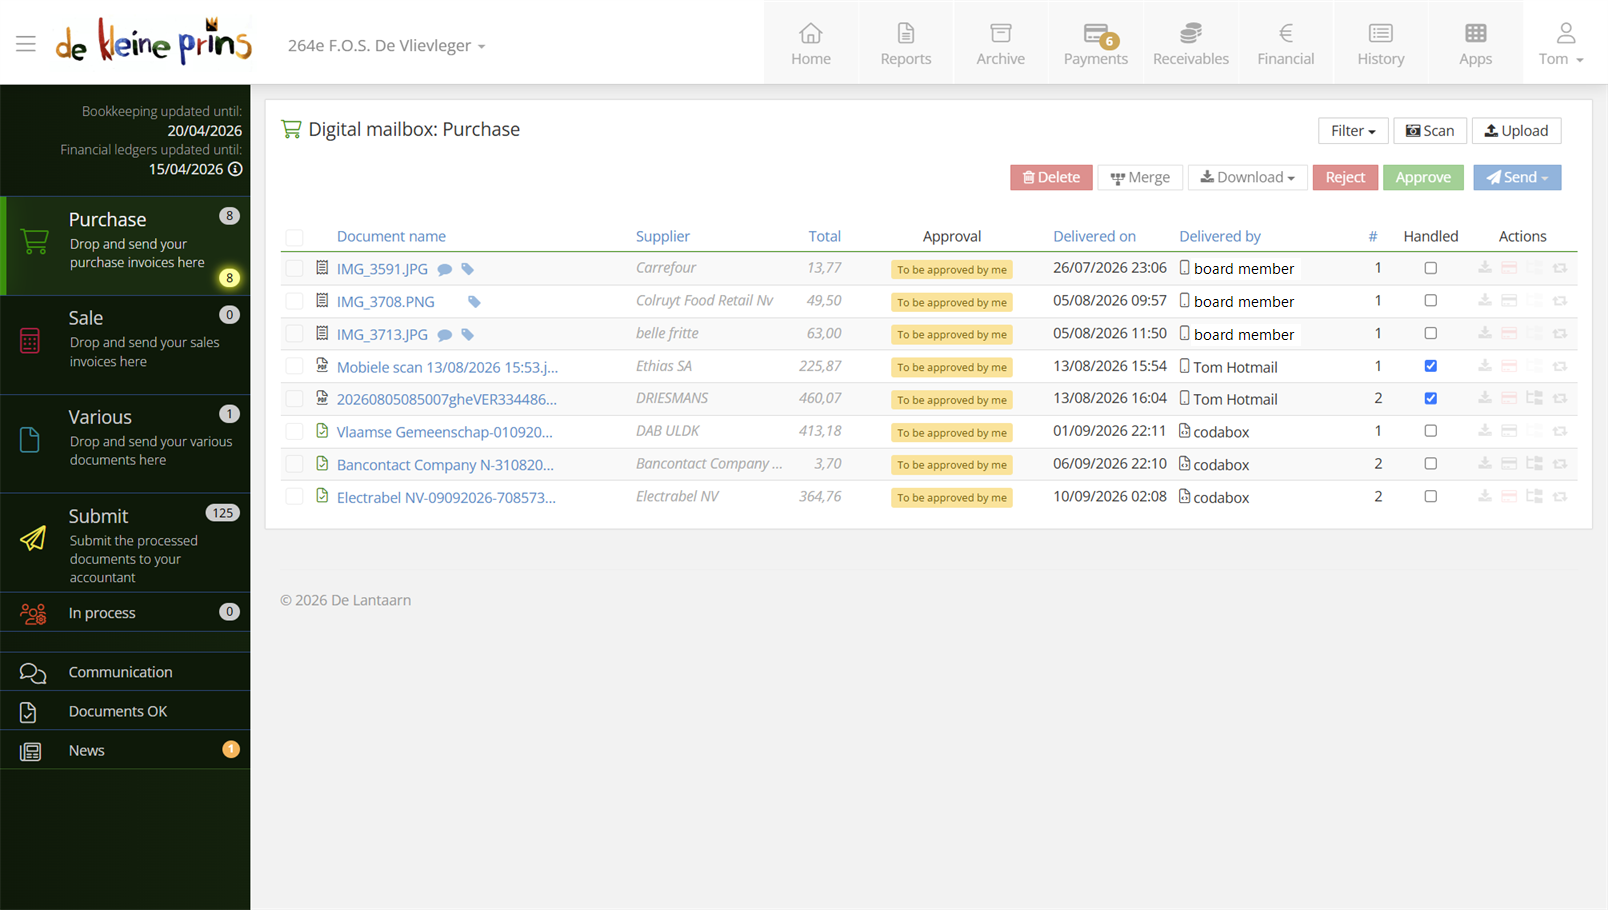
- The Approval column in the purchase mailbox: every invoice awaits approval.
Part 4: setting up payment approval
Here too you start with Activate in the Pay and approve tab. The Lantern immediately adds a rule for a user who may approve without limits. Unlike with invoices, this default rule can be completely overridden here — and thus limited to an amount — though we recommend always keeping one rule for unlimited approvals, so a large or urgent payment never gets stuck. Specific rules are made with Create a new rule.
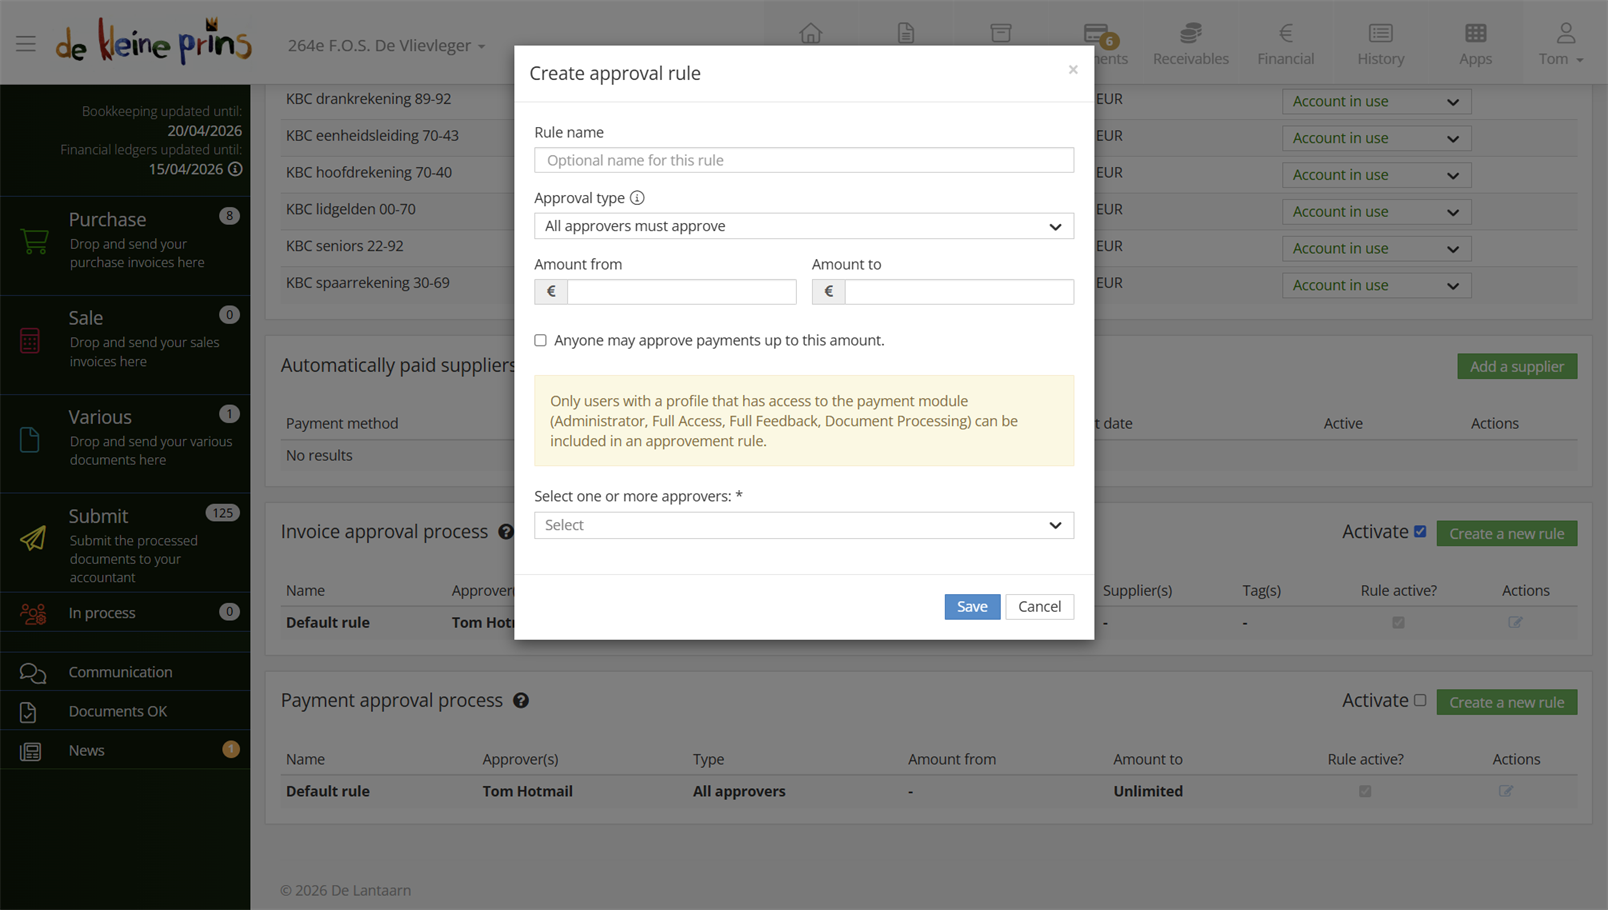
- Creating an approval rule for payments.
When you then want to pay an invoice (via the bank card icon), the payment screen tells you the payment will only be placed in the payment basket after approval. Who may approve — you, or the colleague who receives the request — follows from the rules you set.
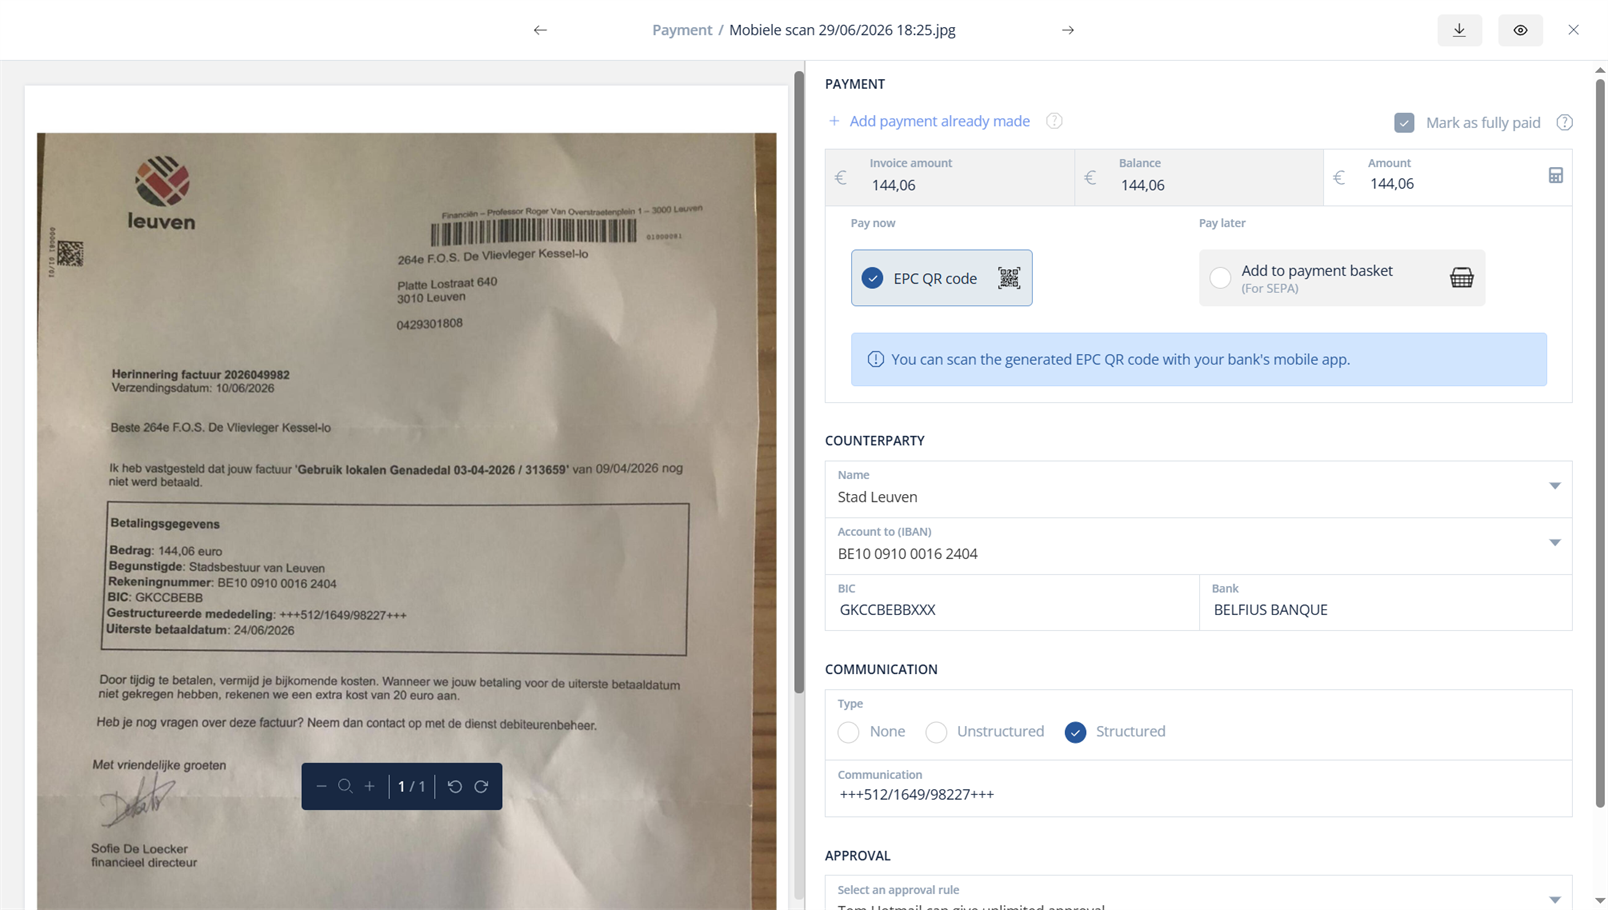
- The payment screen announcing that the payment will be placed in the basket after approval.
Part 5: following up payments to be approved
Under Payments an extra tab appears: Payments to approve, divided into payments you can approve and payments waiting for a colleague. If an approval request is waiting for you, you see an asterisk on the Payments button; you can also receive an email notification for new requests (see the article at the bottom) — useful for a chair who is not in The Lantern daily. An approved payment moves to the payment basket, after which everything proceeds as in course part 8: select, SEPA file, authorise at the bank.
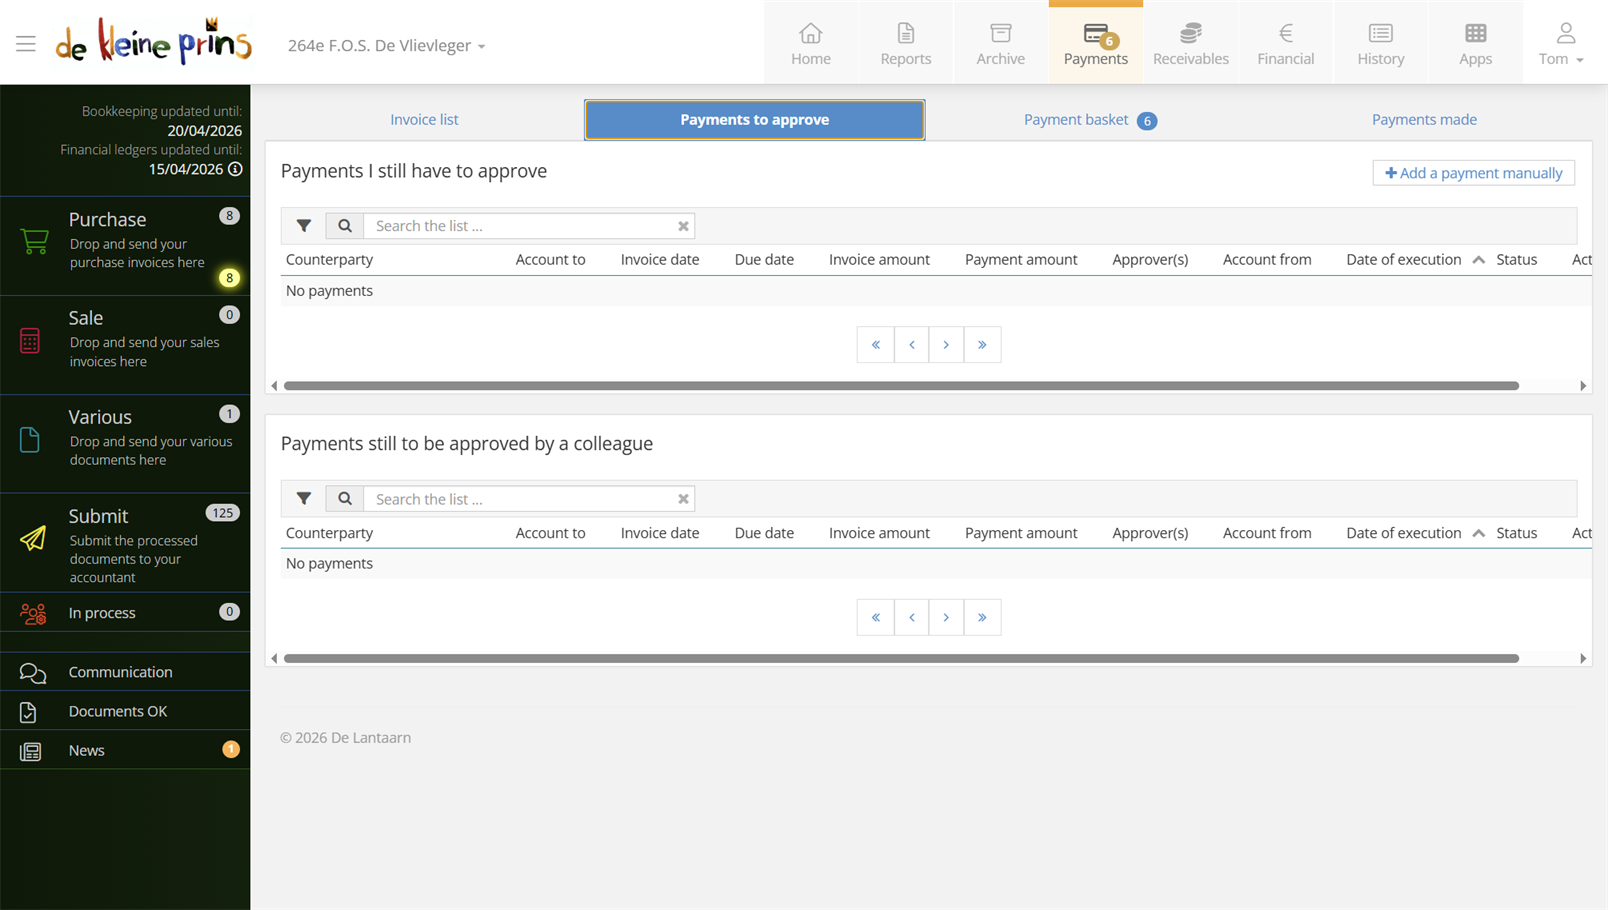
- The Payments to approve tab, divided into what you can approve and what awaits a colleague.
Tip: agree within the board on the maximum turnaround time for an approval (within the week, say). The finest control system fails if requests sit idle and suppliers get paid late as a result.
Next step: in course part 15, the final part, you explore the file settings and user management.
The screenshots show a real file in The Lantern, in the English interface; a few images (the mobile app and the upload flow) still show the Dutch one — the layout is identical. Personal details have been redacted.