
Course The Lantern - merging documents and changing mailbox (#13, optional)
Sometimes what arrived as loose files does belong together: the cover page of an expense claim and the matching receipts, or an invoice with its attachment. With merging you turn them into one document, so the accounts see one whole instead of loose scraps. And if a document sits in the wrong mailbox by accident, you move it with change type. Two small actions that spare the processing a lot of puzzle work.
Part 1: when to merge?
The typical case is the expense claim. The cover page with the settlement is one file; the photographed receipts are three others. For the accounts that is one document: the claim, with the receipts as evidence. Without merging, four separate documents end up in the accounts — confusing for everyone, and there is a risk that a loose receipt gets posted separately as well.
You start merging in the mailbox overview: select the documents that belong together and click Merge at the top.
Part 2: the merge screen
The screen that opens is divided into four sections:
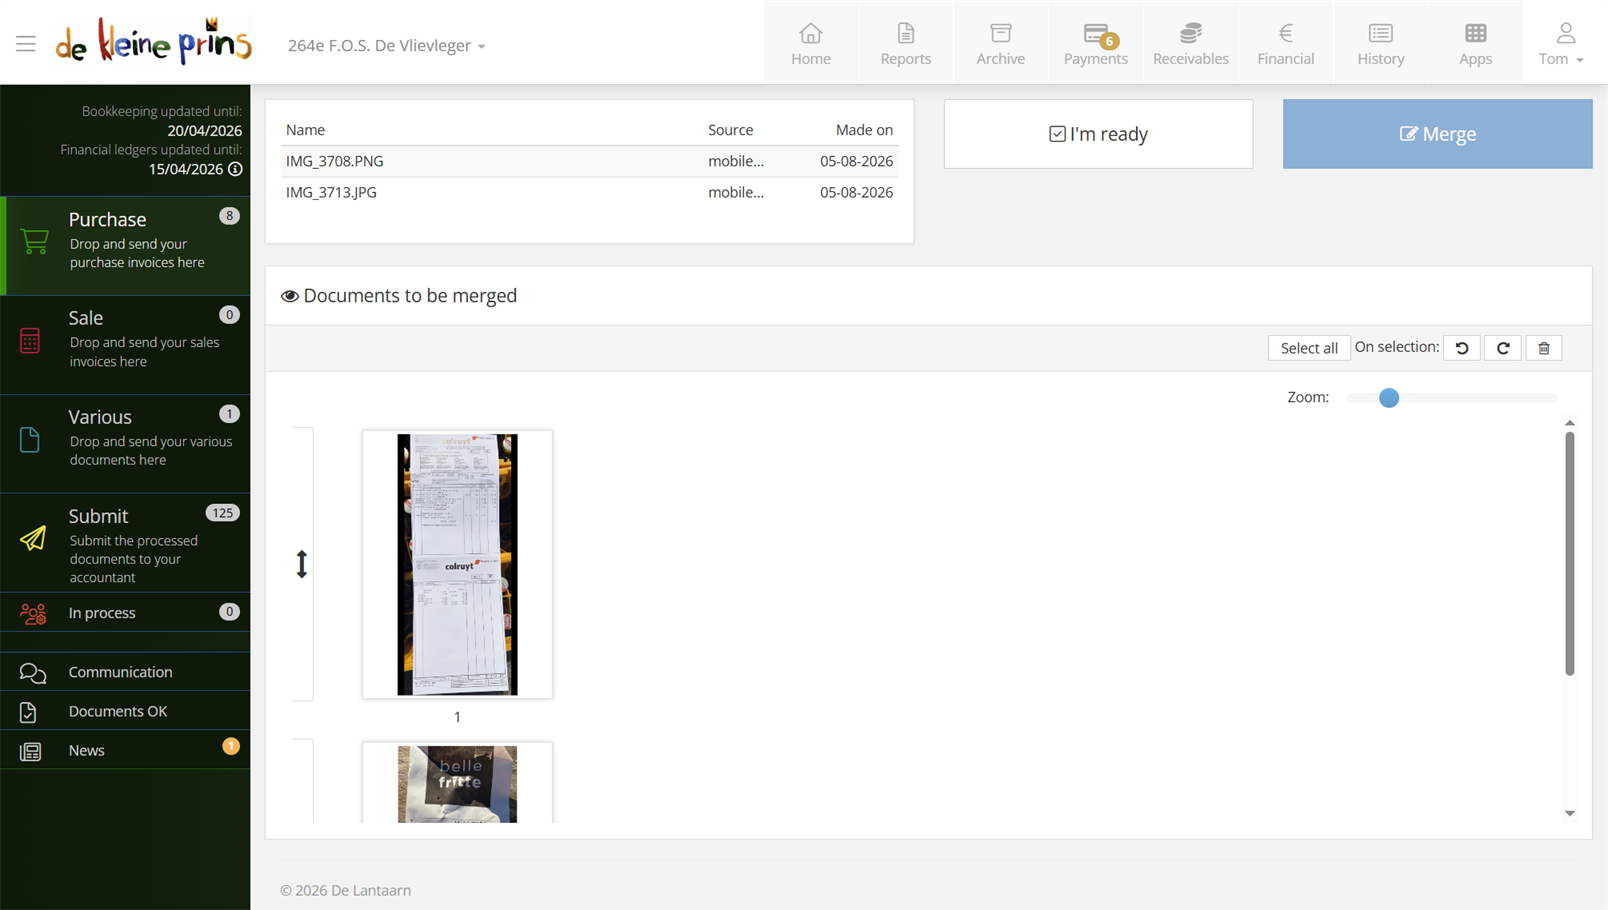
- Top left: information about the selected documents.
- Top right: the two large buttons for saving.
- The tools for the individual pages (rotating, order).
- At the bottom: the previews of all pages from the selected documents.
Tip: use the zoom slider to make the page previews larger or smaller — handy with many small receipts. Around each page preview you will also find the same buttons as in section 3, so you can rotate a single page on the spot.
Part 3: step by step
- Check the orientation. Is a page skewed or upside down? Select it (click the preview; clicking again deselects) and rotate with the buttons.
- Order the pages. Drag the arrows at the front to swap documents around; within a document too you drag a page forwards or backwards. The expense claim’s cover page first, then the receipts.
- Select the pages you want to merge — or use the Select all button.
- Click the Merge button at the top.
- Choose what happens to the new document. In the text field you can give it a name — not needed for the processing, but the option is there. At the bottom you choose: save the document in the mailbox, or send it straight on to the next step.
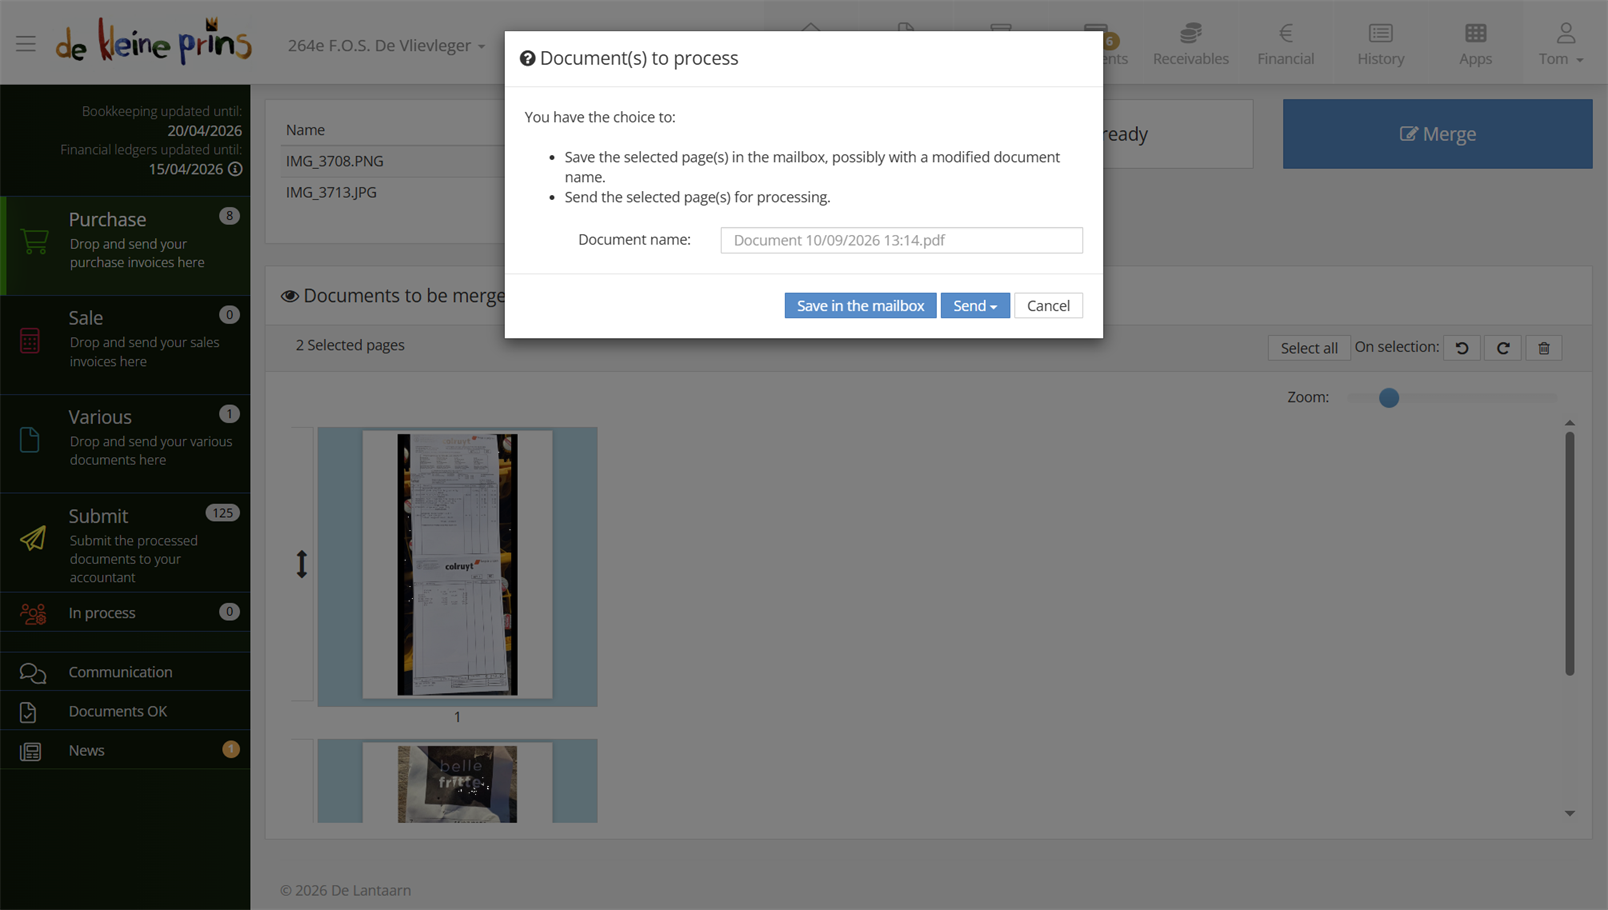
- The name field and the choice between saving and sending.
Part 4: finishing off: what about the loose files?
If you merged ALL the pages, The Lantern asks the closing question by itself; if you merged only a selection, you first click I’m ready. You get three choices: keep the documents, delete them, or cancel. In most cases Delete documents is the right choice: the loose files you just merged no longer need to be kept separately — their content now sits entirely in the new document.
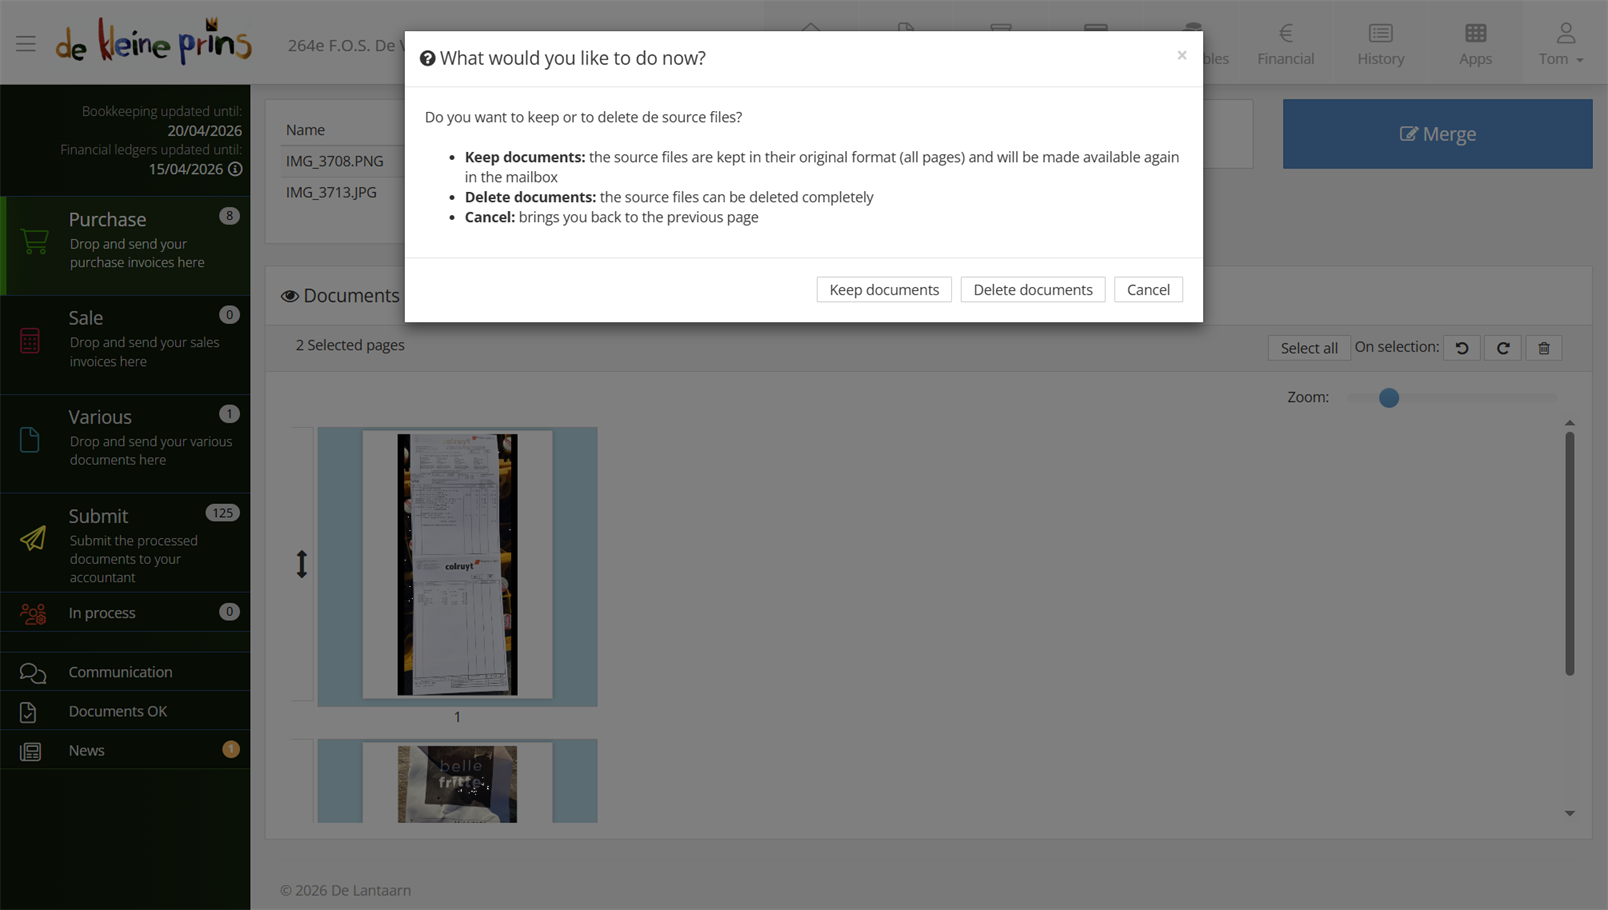
- The closing question about the loose source files.
Part 5: a document to another mailbox
Is a document in the wrong mailbox — a sales invoice among the purchases, a contract between the invoices? Then there is no need to delete it and upload it again. In the overview, click the change type icon under Actions and pick the right mailbox; the document moves at once, with everything attached. That keeps the rule of thumb from course part 2 — every document in the right box — achievable even when something goes wrong once in a while.
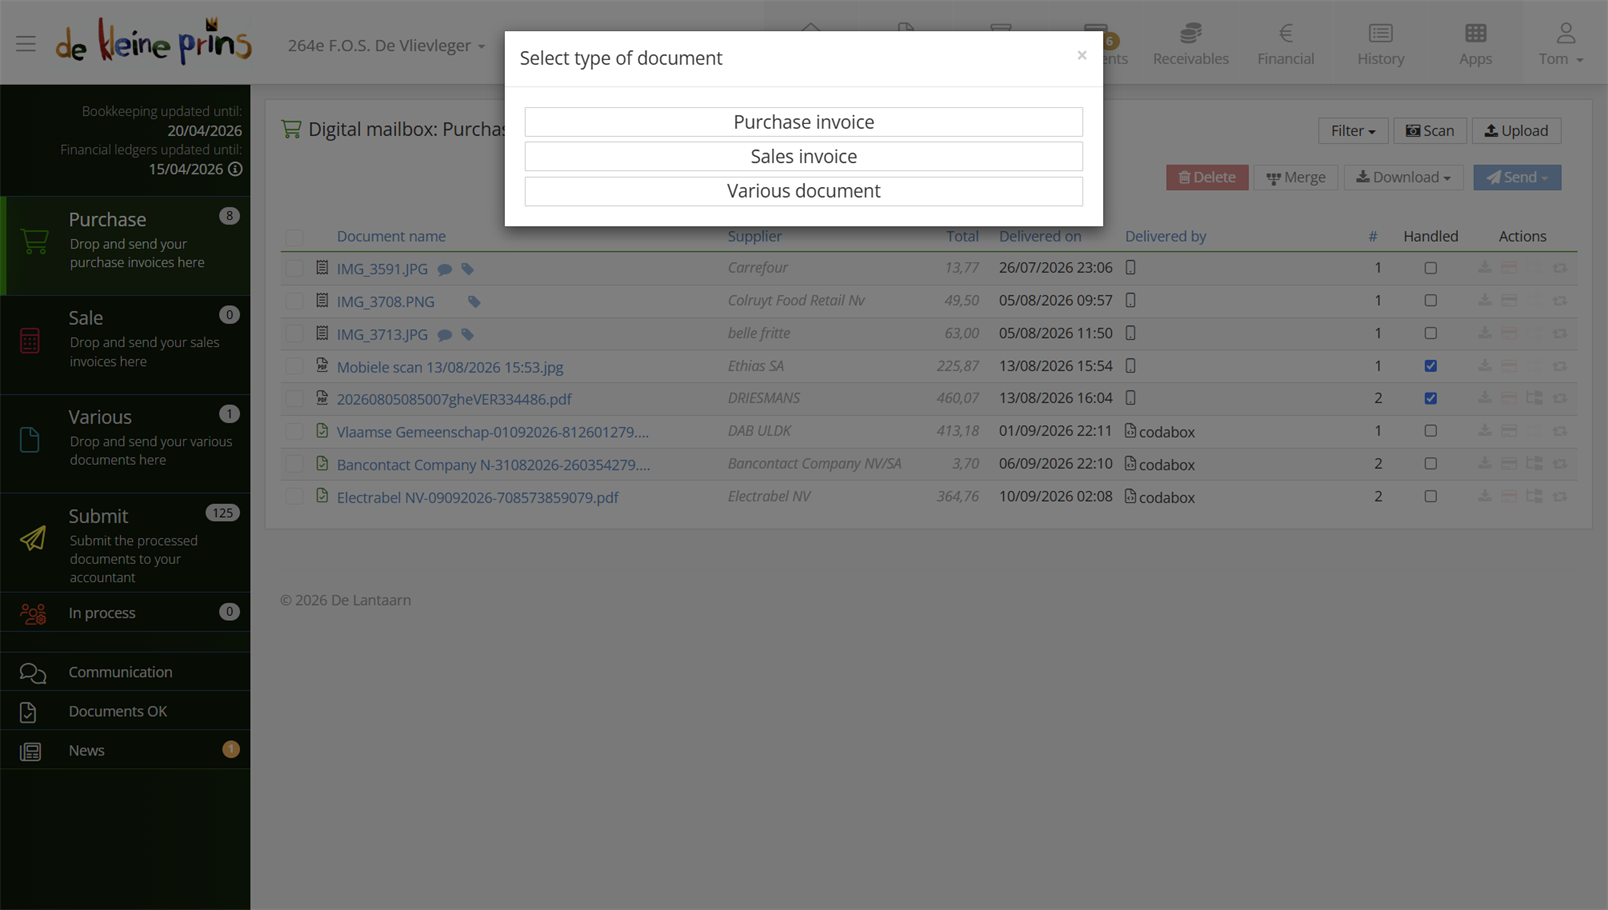
- The change type action with the mailbox choice.
Next step: in course part 14 you get to know the approval flows for invoices and payments — the four-eyes principle in The Lantern.
The screenshots show a real file in The Lantern, in the English interface; a few images (the mobile app and the upload flow) still show the Dutch one — the layout is identical. Personal details have been redacted.