
Course The Lantern - processing in the work list yourself (#6, optional)
With many of our clients, the organisation prepares the entries itself: you check the details and allocate the costs to the right category, we check and post definitively. That work happens in the work list, and it is an approach we gladly recommend — certainly for those who work analytically (per activity or project) or simply want control over exactly where invoices are posted. One glance at your menu tells you whether your file works this way: if you do not see the Submit folder, this part does not apply to your file — we then do all of this for you, and you can happily jump ahead to course part 7. Reading this part and thinking “I want that too”? One call to your account manager is all it takes.
Part 1: how the work list fits in the flow
Documents you send (course part 5) first arrive, in your file, in the work list — the folder is called Submit in the menu (“send the processed documents to your accountant”). There you finish them off: checking the basic data, allocating the costs. Then you send them on to us; we check your preparation and post definitively.
Why would an organisation do this itself? Because you know your documents best: whoever knows on the spot that this brewer’s invoice belongs to the youth camp allocates the cost faster and more accurately than someone who has to deduce it. And that accuracy pays back twice: an allocation that is right at the source gives accounts that are right — and thus reports that are correct straight away (course part 11). Exactly what you need for justifying subsidies or settling an event: no puzzling afterwards, but figures allocated correctly from day one.
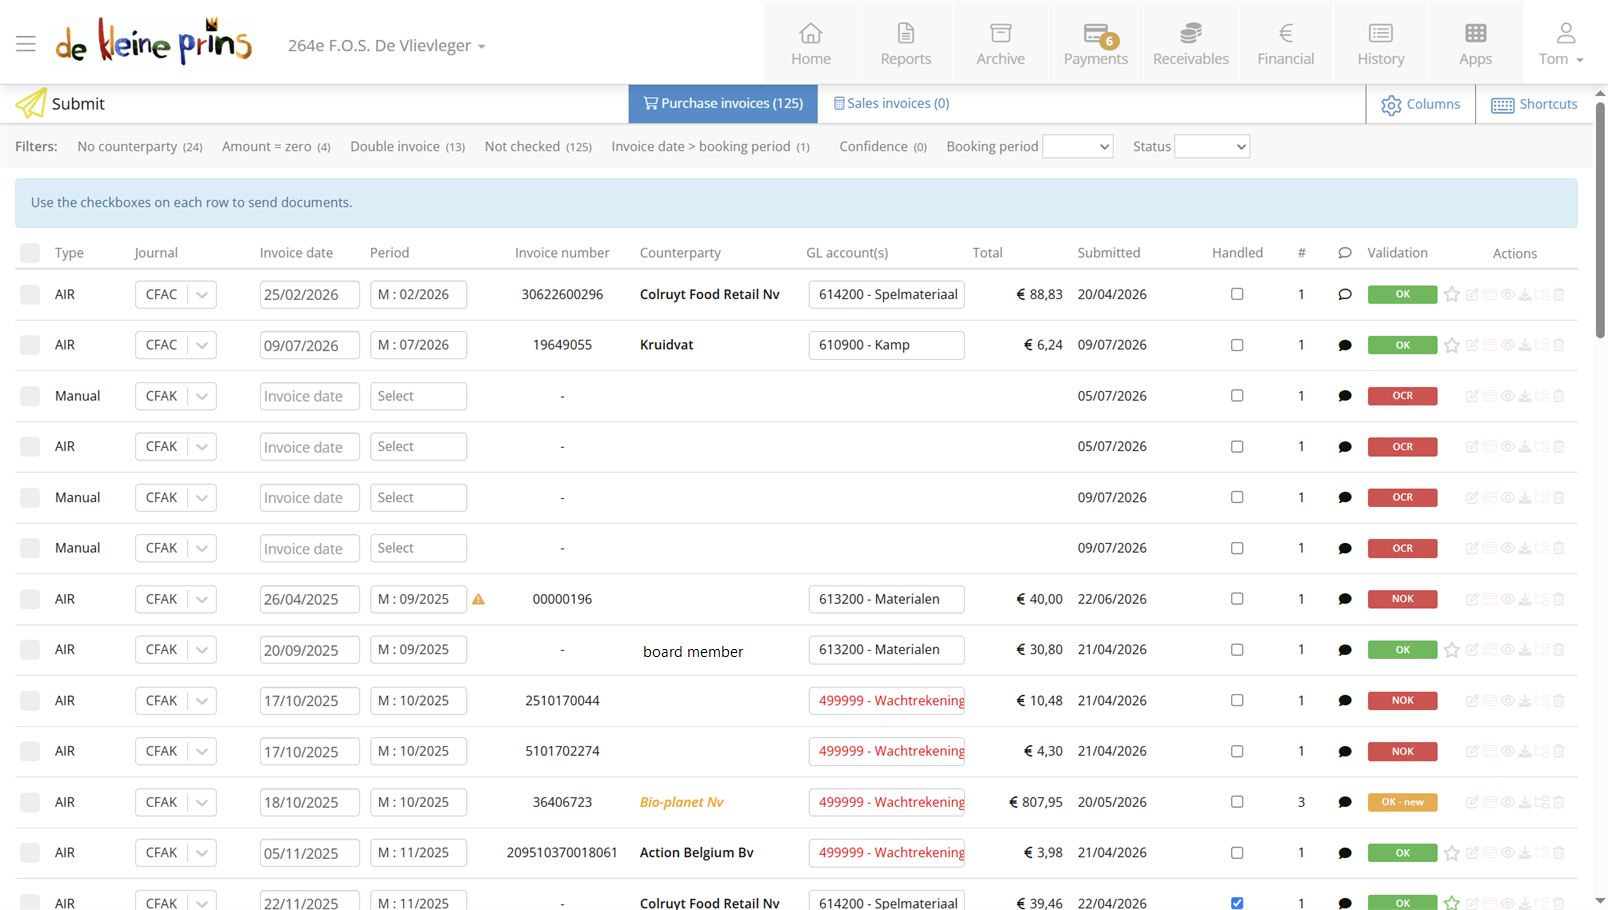
- The work list with the documents to finish.
Part 2: checking the basic data
Open a document in the work list. The software already fills in the basic data (counterparty, date, amounts, VAT) as accurately as possible, and the source determines how reliable that is:
- Peppol invoices (course part 3) arrive as structured UBL files — their data is taken over directly and flawlessly.
- Uploaded or scanned documents go through text recognition. It is very good — often everything is right without intervention — but not perfect: handwritten text is never recognised, and a poor scan takes its toll.
Correcting a misread detail is simple: click in the field and type the right value. Nothing more to it.
Part 3: detail lines and categories
In the detail lines you indicate which costs the document covers. That can be one line, or a breakdown across several — an expense claim with three kinds of costs (say transport, materials and catering) gets three lines. You create a new line with Add detail line; next to it sit Delete detail line and Reset detail lines. The Lantern moreover creates new lines by itself until the total of the detail lines matches the document’s total amount — so you cannot “forget” to allocate a part.
The field is called Subcategory. You pick one by scrolling through the list or entering a search term — the name or the account number. All the categories you CAN pick are shown; creating new ones is not possible (we guard that, so the chart of accounts stays clean).
Below it, each detail line has the field Analytisch (analytical). If your organisation keeps analytical accounts, this is the most important field in the whole work list. The subcategory says what kind of cost it is (drinks, transport, rent); the analytical code says what for — the youth camp, the spaghetti fundraiser, the subsidised project. It is precisely that second layer that later makes the figures per activity or project possible, in the reports and in The Binoculars (course part 11). If you split a document across several detail lines, you give each line its own code: that is how you divide one invoice correctly over two activities. Analytical info shows you which codes your file knows. You do not create new codes yourself: which codes your file gets is something you agree with your account manager, who sets them up for you.
Here also sits the learning side of the system: for a new supplier it first suggests the suspense account (499999 Clearfacts suspense account). Correct that to the right category and the software will suggest that category by itself on the next document from the same supplier. After a few weeks you are largely on autopilot.
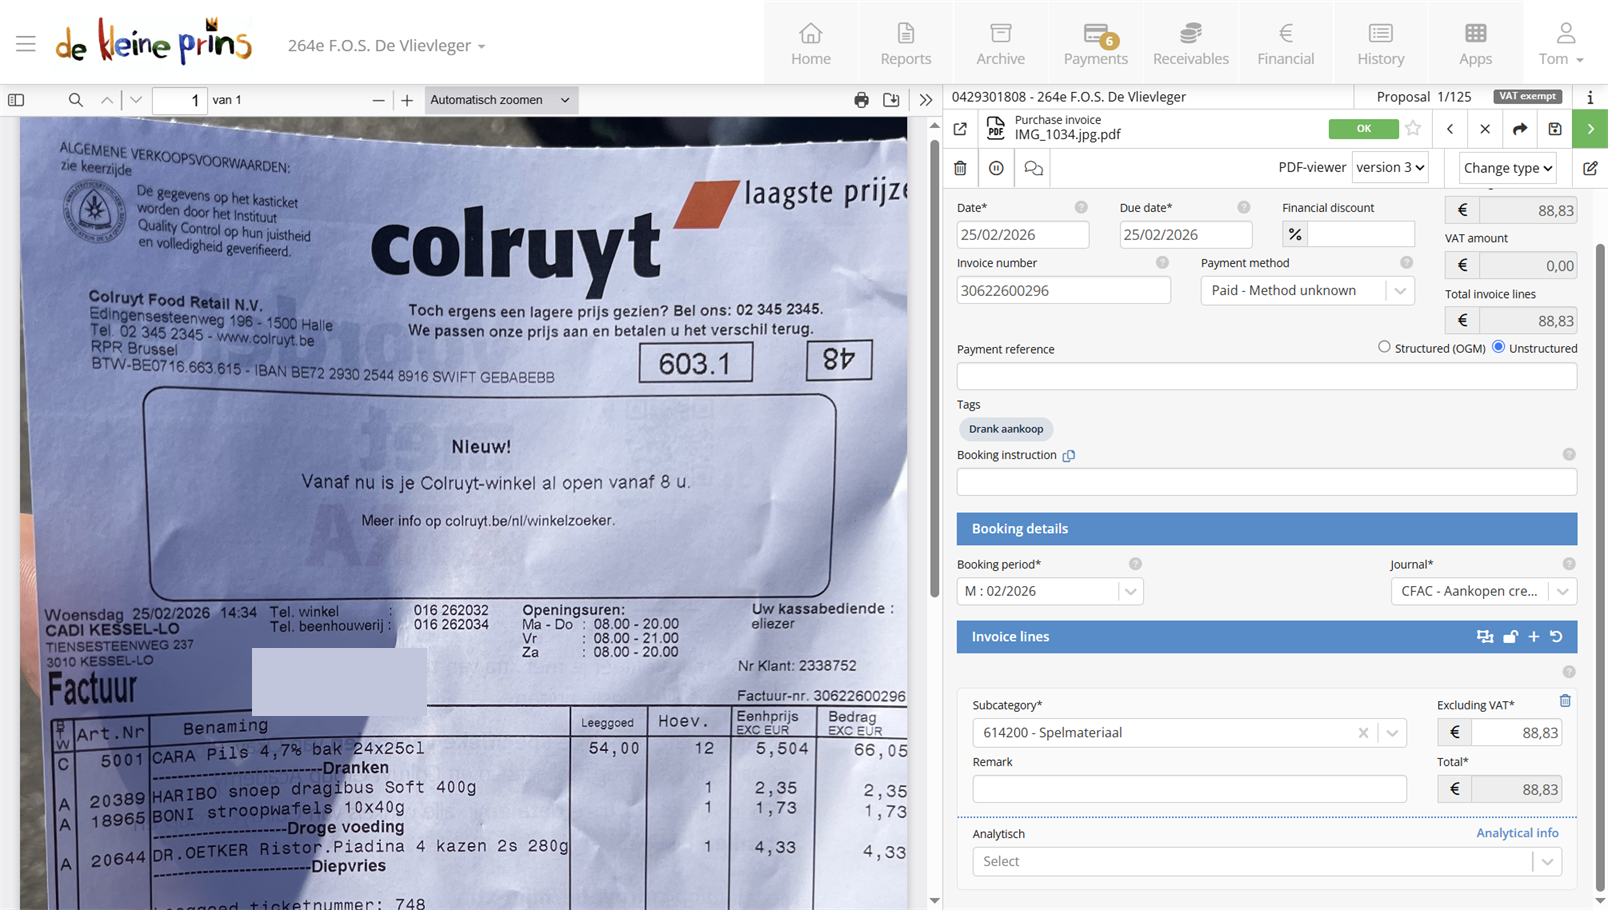
- The detail lines with the Subcategory field.
- The Add detail line, Delete detail line and Reset detail lines buttons.
- The Analytisch field per detail line, with the Analytical info link.
Part 4: working faster with templates
The Open templates button in the bar above the detail lines shows the most frequently and most recently used categories for the current counterparty. One click on such a suggestion and the software applies it to the current document. With recurring suppliers — the payroll office, the energy supplier, the printer — that saves searching every single month.
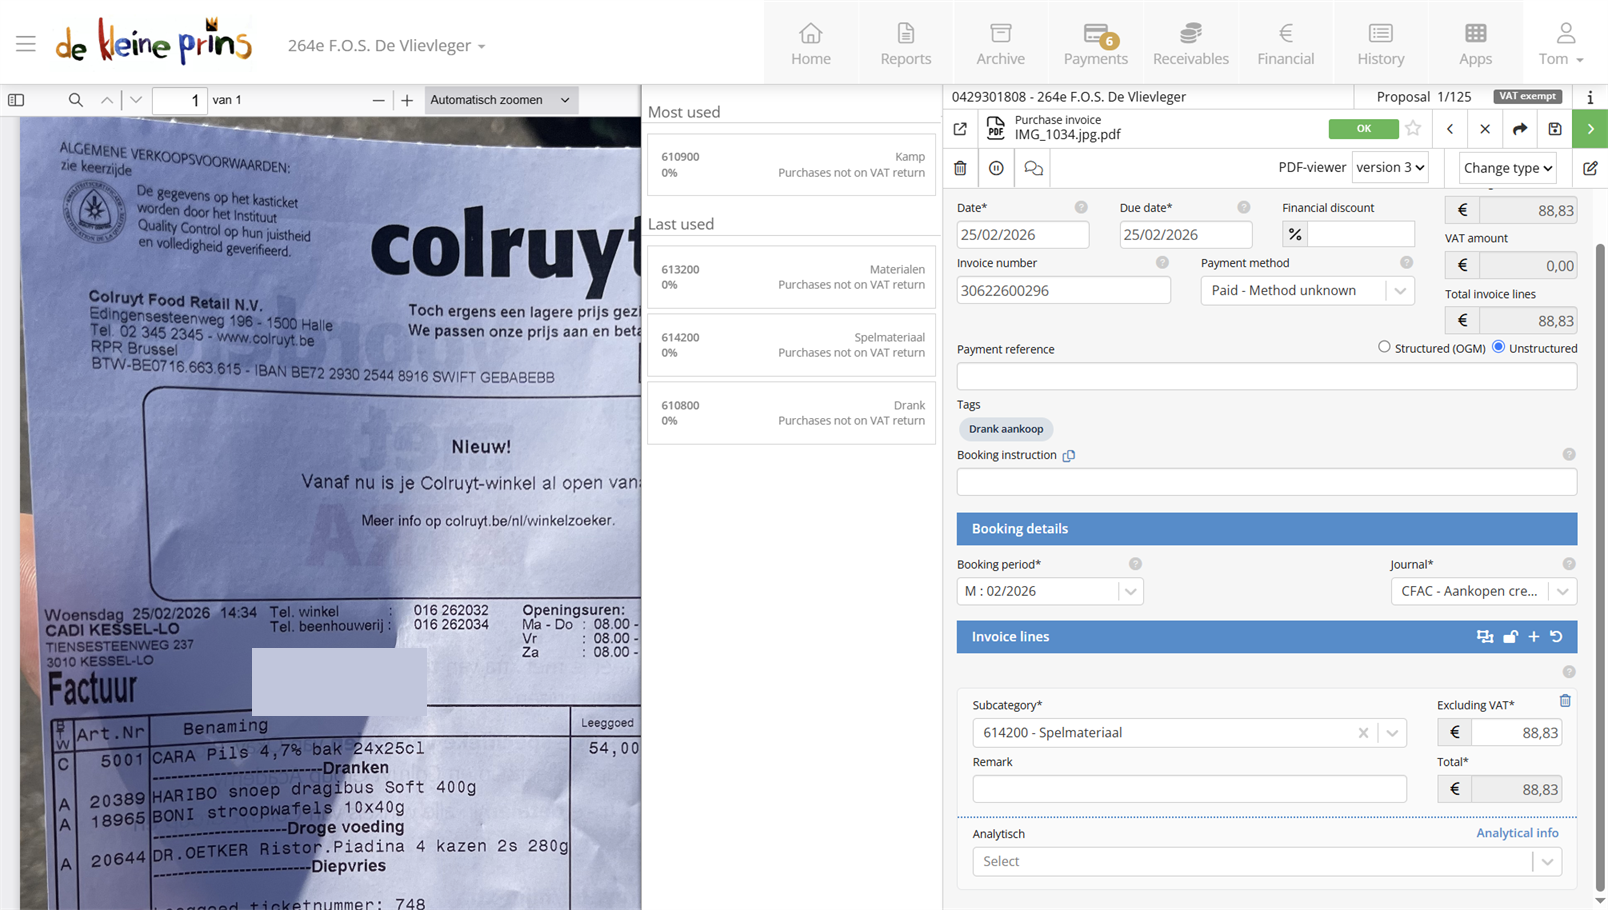
- The templates with the most used categories.
Part 5: sending on to us
Once the document is finished, you send it on; we check your preparation and post definitively. That safety net is essential to remember: you cannot do anything irreversibly wrong here — an accountant always looks over your shoulder. Allocate a cost to the wrong category for a while and we will put it right, and the correction shows you exactly how it should be.
Tip: doubting between two categories for a cost? Pick one and put your doubt in a comment (course part 5) — “doubt: training or team building?”. That is faster for everyone than leaving the document sitting until someone knows for sure.
Next step: course part 7 starts the following-up block: tracking and paying your invoices.
The screenshots show a real file in The Lantern, in the English interface; a few images (the mobile app and the upload flow) still show the Dutch one — the layout is identical. Personal details have been redacted.